Welcome to the continuation of our series on using the PowerShell function Import-CSV. In part 1 of this series we touched on the basics of using the Import-Csv CmdLet by reading a file into an array variable and extracting elements and data from our input data.
Looping with PowerSehll Import-CSV foreach
To enhance this process of extracting elements and data, we can now take the data in memory and using a ForEach CmdLet to parse the data and do a multitude of actions with it.
One thing that you may have noticed in the first part of the script is that we named the variable using the pluralized $userobjects rather than the singular $userobject. Why is that you ask? Great question!
To simplify the identification of objects in our array we want to refer to them in a logical way of a singular userobject in an array, or list, of userobjects. While PowerShell doesnt formally use pluralization, I just find it easier to follow and hopefully it’s a better practice of programming.
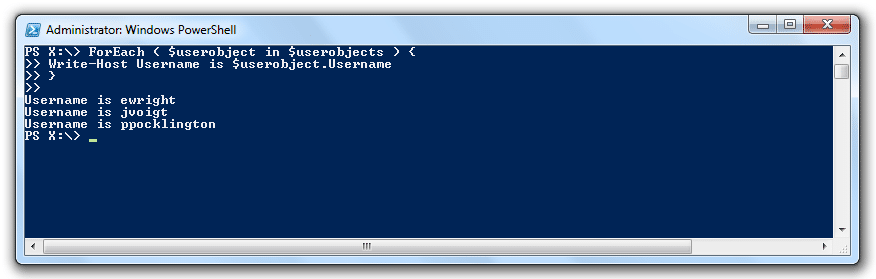
First we will add the very basic ForEach to output the Usernames to the screen. Using our pluralization format this is what we do:
ForEach ( $userobject in $userobjects ) {
Write-Host Username is $userobject.Username
}
Remember that everything within the curly braces will be performed against each object in the array sequentially and then move on to the next until it reaches the end of the array and moves to the next command outside of the curly braces.
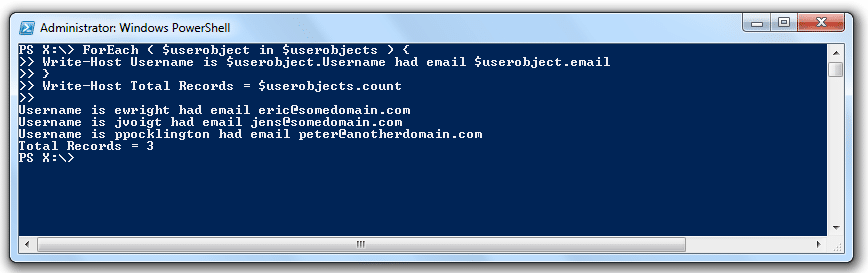
In other words the PowerShell Import-CSVForEach loops through the data and then move onwards, so if we want to display all of the usernames, and emails followed by a count of the total records it would look like this:
ForEach ( $userobject in $userobjects ) {
Write-Host Username is $userobject.Username had email $userobject.email
}
Write-Host Total Records = $userobjects.count
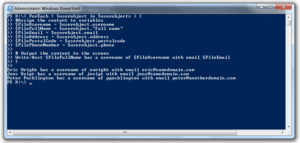
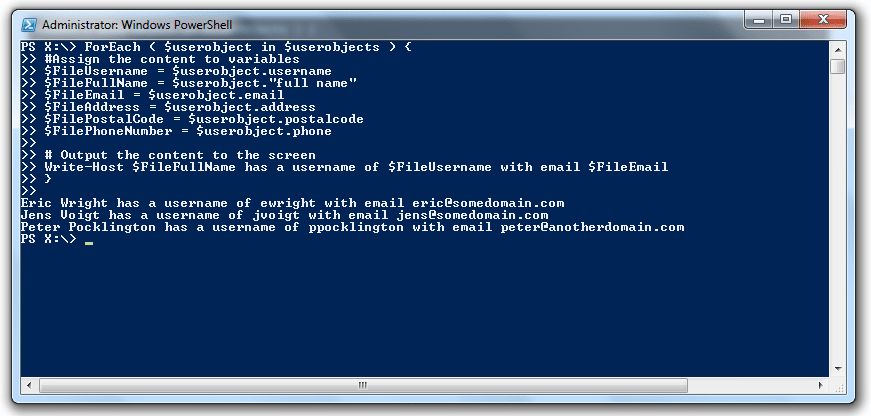
Because we are capturing elements and the contained data, it is better to assign these as variables within our loop so that we can address them and also perform other tasks such as concatenation, splitting, calculation and any of a variety of other actions. I prefer to assign a meaningful name in a format like $FileVariableName or $InputVariableName. Here is what I would do in this particular case:
# Output the content to the screen
Write-Host $FileFullName has a username of $FileUsername with email $FileEmail
}
Write-Host Total Records = $userobjects.count
Notice that because one of our columns had a space in the name (Full Name) we had to enclose the column header name in double quotes as $userobject.”full name” or else it would throw an error.
At this point you can see the capabilities of using your ForEach loop process. Recall that you can also pass along multiple commands to the loop. As long as you have the correct modules loaded, you can now use this process to run Microsoft Exchange CmdLets such as Get-Contact to check our Exchange directory if these are existing contacts:
# Output the content to the screen
Write-Host $FileFullName has a username of $FileUsername with email $FileEmail
if ( Get-Contact -Identity $FileEmail ) {
Write-Host $FileFullName exists in the Exchange directory
}
}
Write-Host Total Records = $userobjects.count
Now we’ve expanded our script to make it more reliable, and depending on the complexity of the data we could see many other operations that we require to make use of the input data. The next article in the series will have us attack some additional tasks including:
Adding a Header row where one does not exist
Expand our Get-Contact query to perform a New-MailContact command if the record does not exist
I hope that you find this helpful. The goal is to lay out the fundamentals that I have used for some of the more complex scripts that have been created for tasks such as importing and managing Exchange Contacts, managing Active Directory user account information and many such tasks. In PowerShell, Import-CSV with a foreach loop is a very powerful too.
This post is part of a series on using the PowerShell Import-CSV Command.
Hi Eric. Being new to Powershell, I found this VERY helpful. I’m looking for part 3, especially the part about managing AD user account info. Does it exist?
Thanks for the comment and I’m glad you liked it. Strangely enough I had this as an unfinished series. I’ll get it cooked up and posted shortly. Thanks for the reminder 🙂
Eric, I am also new to Powershell (actually new to all types of scripting). Part 1 and Part 2 helped me create my first Powershell script to add acl rights for a group to 5 folders at about 60 different shares. Saved me having to click on then change acl rights on about 300 folders all through our DFS structure!
Eric,
This is an excellent compilation of information importing csv’s and then using the data in the resulting array. Thanks. Very helpful. I’m now looking for part 3.


Hi Eric. Being new to Powershell, I found this VERY helpful. I’m looking for part 3, especially the part about managing AD user account info. Does it exist?
Hi Mark,
Thanks for the comment and I’m glad you liked it. Strangely enough I had this as an unfinished series. I’ll get it cooked up and posted shortly. Thanks for the reminder 🙂
Eric
Eric, I am also new to Powershell (actually new to all types of scripting). Part 1 and Part 2 helped me create my first Powershell script to add acl rights for a group to 5 folders at about 60 different shares. Saved me having to click on then change acl rights on about 300 folders all through our DFS structure!
I look forward to Part 3 as well.
Thank you so much!
James.
Awesome! Thanks for the comment and I’m glad that it has helped 🙂
Great info, good examples. Thank you, and hope you do a part 3. Using this info to create user accounts in bulk, based on an exported CSV from HR.
As a powershell novice I am looking forward to Part3 as well.
Great work Eric
love the Jens Voigt reference!!
keep the rubber down
Eric,
This is an excellent compilation of information importing csv’s and then using the data in the resulting array. Thanks. Very helpful. I’m now looking for part 3.
excellent !!!