

Provisioning on Packet.net is super easy using Terraform. One of the tricks you will need to know up front is that for Terraform and for many other provisioning tools, you need to provide a minimum set of parameters to launch.
As a minimum, you need to provide these following parameters as shown in the Terraform docs for the Packet provisioner:
- hostname – gotta name ’em all
- project_id – you need to know, or create the project to launch into
- facility – which location are you deploying into? (EWR1, SJC1, etc.)
- plan – which node type?
- billing_cycle – hourly or monthly
- operating_system – which OS will the node run?
Some are simple to use because they are your criteria. We choose the hostname, and we choose the billing cycle as either a static choice of hourly or monthly. How can we get the other details about our deployment? You can gather some data using a browser such as browsing to your project and then pulling the project ID from the URL. That still leaves us in search of the plan type, operating_system, and facility.
For completeness, let’s learn how to simply gather all four items (operating system list, project ID, plan types, facility) from the Packet.net API.
You’ll need a terminal session, your API key to query the Packet.net API, and the JQ tool for parsing out JSON results into something a little more friendly.
Querying the API is as easy as sending your token to the API using the cURL command and selecting which entities you want to query. This is the basic framework:
curl -s -X GET -H 'X-Auth-Token: YOURAPITOKEN' 'https://api.packet.net/OBJECT'
Now we can dig into the four easy examples we have.
Finding the Packet.net Facility Name
The simple one-liner will pull a JSON result that gives you the locations and subsequent Facility name that you can use and then parses out just the location codes to use. If you remove the '.facilities[].code' portion of the command it will show you the full pretty-printed JSON results including the full facility descriptions.
curl -s -X GET -H 'X-Auth-Token: YOURAPITOKEN' 'https://api.packet.net/facilities' | jq '.facilities[].code'
Finding the Packet.net Project ID
You’ll want the full JSON result so you can choose from your active projects if you have more than one. Just drill into the JSON results and you can locate the id field:
curl -s -X GET -H 'X-Auth-Token: YOURAPITOKEN' 'https://api.packet.net/projects' | jq
Finding the Packet.net Plan Names
Plans don’t shift around too much, just like facilities. Here is the simple query to get all the plan names and match them to what node type you want to use:
curl -s -X GET -H 'X-Auth-Token: YOURAPITOKEN' 'https://api.packet.net/plans' | jq '.plans[].slug'
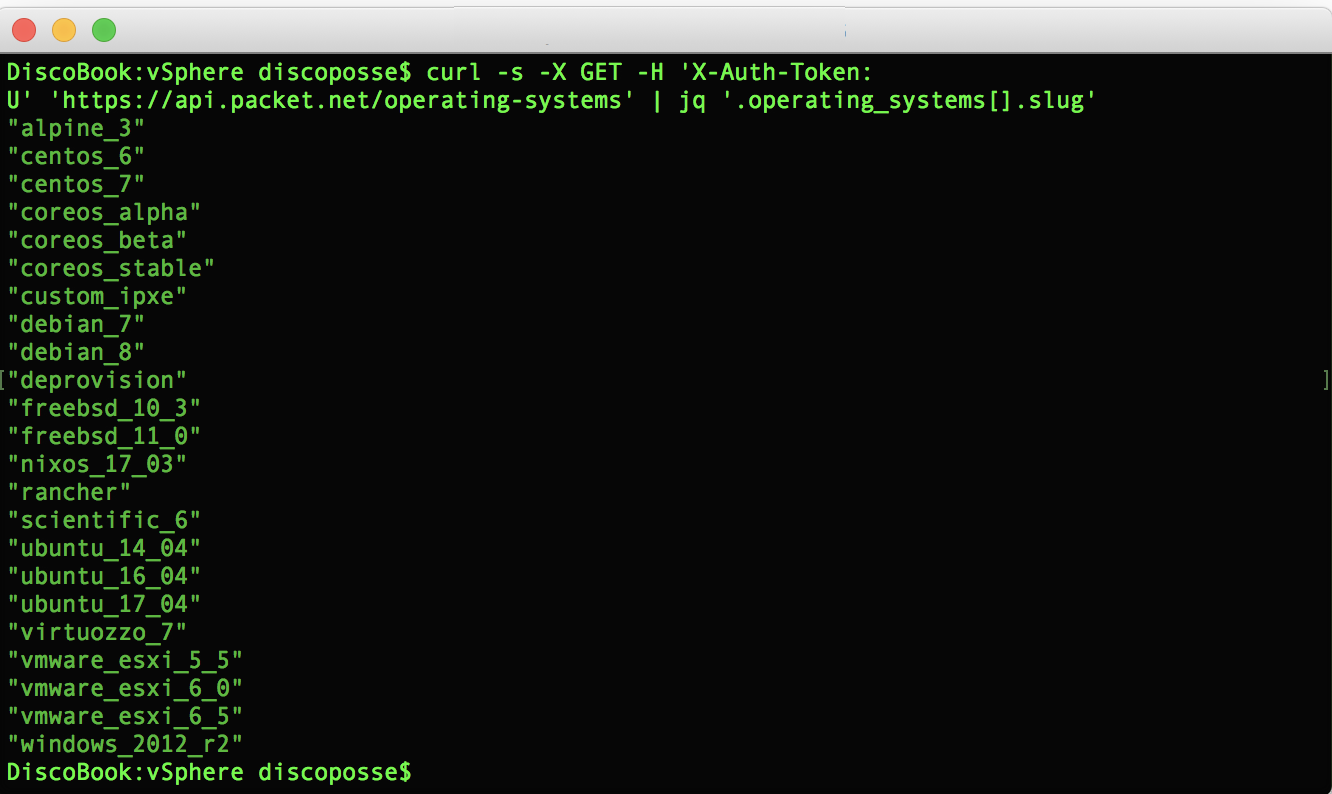
Finding the Packet.net Operating System Types
By now, you can guess where we are going wth the next one. Query the API, parse out the results, and provide the slugs for the Operating System names which we will use for Terraform and other provisioning tools which consume the Packet API.
curl -s -X GET -H 'X-Auth-Token: YOURAPITOKEN' 'https://api.packet.net/operating-systems' | jq '.operating_systems[].slug'
The result will give you all of the slug names that are usable as the operating_system parameter. In the case of vSphere 6.5, it happens to be vmware_esxi_6_5 which may not have been obvious if you were to try guessing it out.
Now you can take those easy JSON results and feed them into a Terraform file or you may also use these raw queries as part of other configuration management and provisioning solutions. Hope you find this helpful!
Also, you can sign up for Packet.net to kick the tires on this goodness and you can use VDM25 as a referral code to get a 25$ credit to use. Make sure you tell them DiscoPosse and the Virtual Design Master crew sent you!