

Let’s just say that you have a standalone MySQL instance that you want to put on something more resilient. You’ve got a few choices on how to do that, and Amazon Web Services RDS using Aurora DB is a great place to host it. Here are the steps that I’ve taken to migrate from a Digital Ocean one-click WordPress instance to running the data are on Aurora DB.
Things to think about during this transition include:
- Single AZ (Availability Zone) or Multi-AZ deployment
- RDS instance size (price and performance will matter)
One of the great things about AWS is that you can scale dynamically to meet your needs. There is always a tradeoff (price/performance/resiliency) in your architecture, but that’s a different discussion that we can have in another post.
Cost and performance of operating RDS
AWS is super easy to run infrastructure, but my shift from 10$ a month on Digital Ocean to a Multi-AZ RDS instance is based on performance over cost. It’s a tradeoff that I chose to make. Make sure that you are fully aware of the implications of your database hosting choice.
Prerequisites Needed:
- AWS account
- AWS RDS Cluster configured
- Root credentials for source and target databases
Migrating MySQL to RDS Aurora DB using mysqldump
The full instructions as provided by AWS are here, but these are my quick notes on the transition to prove out that it works as simply as AWS says so.
First, find out your current RDS cluster endpoint address by going to your RDS console:
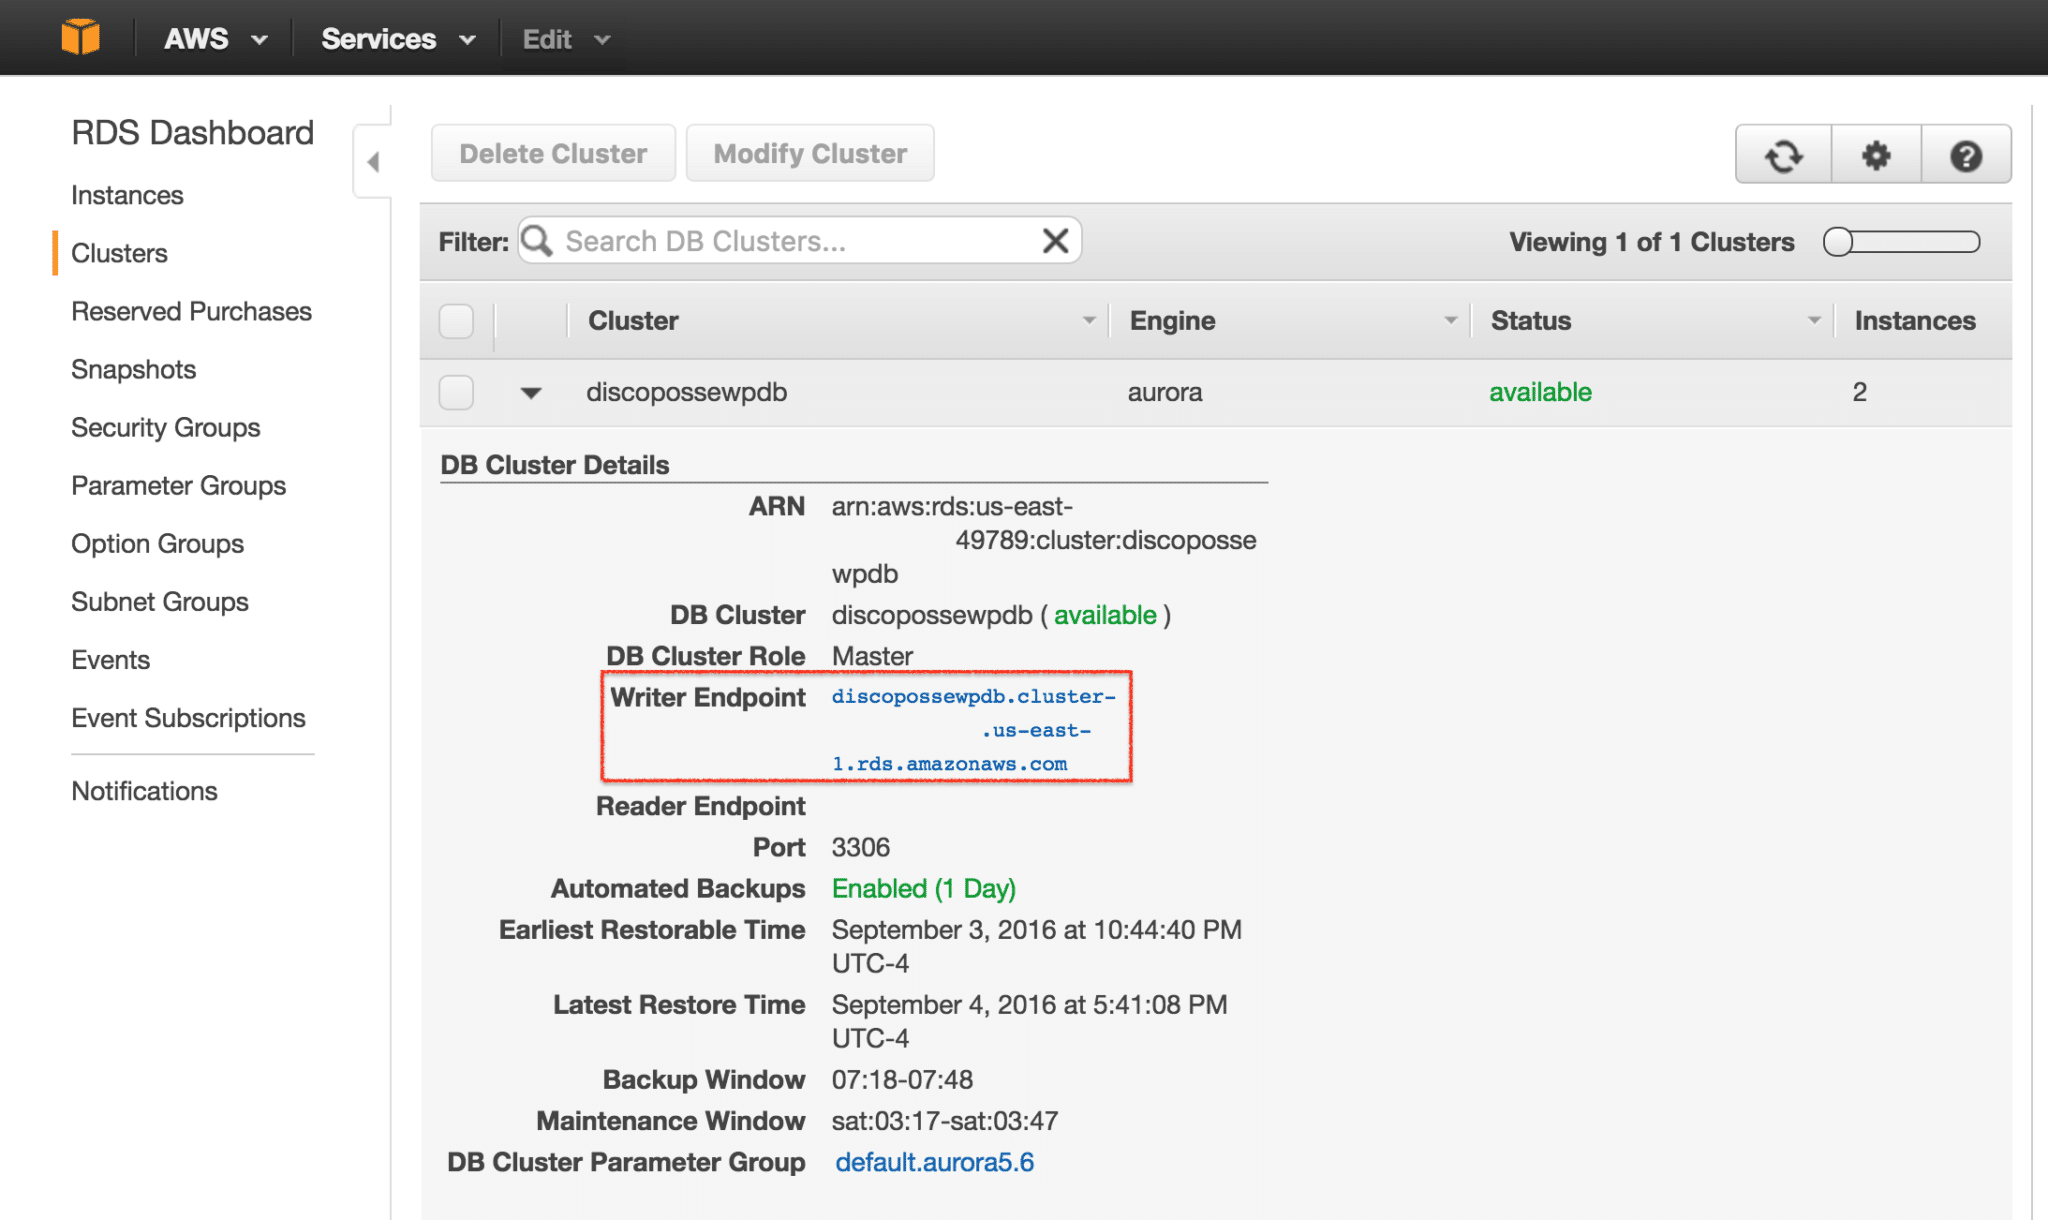
We can see that in this case, there is a writer endpoint and a second reader endpoint. We will use the writer endpoint to migrate the data:

I’m using the root account on both the source and target, so make sure you have the credentials for both instances to be able to do the same.
The export/import one-liner is as follows. Replace the CAPITALIZED sections with the appropriate information:
mysqldump -u root -pSOURCEPASSWORD --database SOURCEDATABASE --single-transaction --compress --order-by-primary | mysql -u root -pTARGETPASSWORD --port=3306 —-host=mytargetdb.cluster-uniquename.us-east-1.rds.amazonaws.com
Once you’ve created the database by populating it from the source data, you have to create a user and allow access to the database. Launch the MySQL client to attach to your target database:
mysql -u root -pTARGETPASSWORD —host=mytargetdb.cluster-uniquename.us-east-1.rds.amazonaws.com
Now you can create the user and give the appropriate admin privileges on the database needed. Replace the CAPITALIZED sections with the appropriate information:
grant all privileges on YOURDATABASE.* to ‘YOURUSER'@'%' identified by ‘YOURPASSWORD’;
Once you’ve done that, simply point your application towards the new database using the configuration file. For a WordPress database connection, this is found in your wp-config.php file in the root folder of your site.
I know it works, because you’re reading this from my site which was transferred from an all-in-one WordPress deployment in Digital Ocean and is now running on RDS inside AWS.