Let’s say that you wanted to run a lab using AWS and you need to set up a VPC. Thats a very common design that takes advantage of creating a secured Virtual Private Cloud within your AWS environment to isolate resources. There are 2 options for setting up your VPC networking for those who are going to access it directly, or with a software VPN.
There is VPC with a Single Public Subnet:
Then there is VPC with Public and Private Subnets:
There are also 2 hardware VPN options, but that is a different configuration that is less likely for many smaller lab configurations or for many small production environments.
VPC is Free…sort of
Setting up your VPC resources is entirely free. The costs will only come when you deploy your EC2 instances and if you attach Elastic IP addresses within the environment. Elastic IP addresses are also only charged when the are allocated but not associated, but that’s a blog post all unto itself that will come later.
One of the features you need to enable in the case of running a VPC with public and private subnets NAT (Network Address Translation) so that your EC2 instances can reach the outside world for updates and other internet resources. That is because you will have to bridge the private network to the internet segment in order to gain access. The access is only for retrieval of data, and is not what is used for the internet to access your privately hosted instances.
When you create your VPC, the NAT options are presented in the VPC wizard:
Using a NAT Gateway will be done for those who want to use a software VPN and a consistent Elastic IP address. Details on the pricing configuration of software VPN is here (http://aws.amazon.com/vpc/pricing/)
The other link in the right side allows us to configure a NAT instance instead:
The only catch here is that when you select from the drop down, we only have sizes m1.small or other larger (aka more expensive) options available:
Prices for m1.small range by region, and in this case, we also have the ability to use reserved instances (pre-purchased at lower rate) or on-demand. Since many of us will want a lab environment, on-demand instances are the ideal way to go.
Once we spin up our environment, we will have an EC2 instance running for the NAT Instance. I’ve labeled mine NAT Instance – DiscoDemo so that I remember what it is:
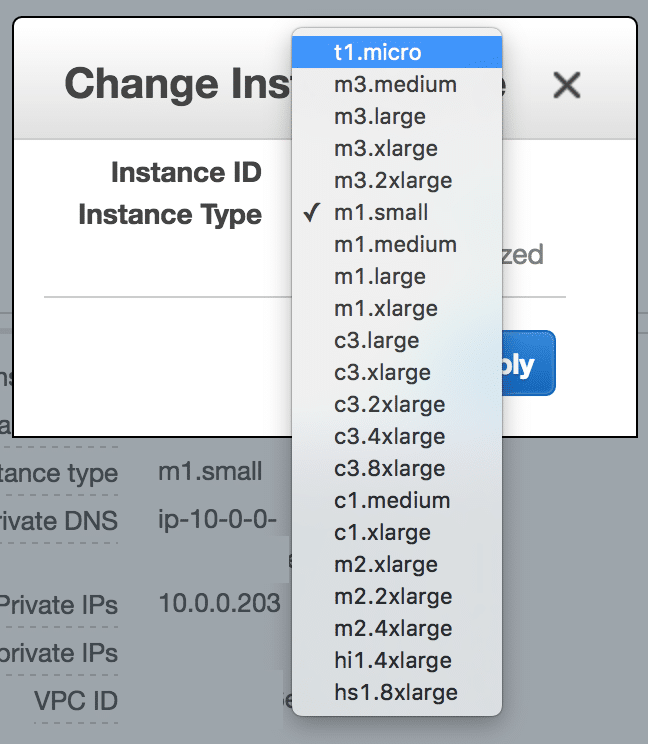
I’m looking to reduce the size of the instance to the smallest possible, which happens to be t1.micro so this is where we do that.
Stopping and Resizing your EC2 NAT Instance
Note that you will only be shutting off your EC2 instance for a minute, and this does not affect inbound connectivity to the VPC at all. This only affects the access from your private subnet EC2 resources out to the internet.
To resize our instance, we have to stop it first. We do this by selecting the instance in the list, and using the Actions button to select the Instance State | Stop option.
Make sure to choose stop and DO NOT SELECT TERMINATE. Terminating will destroy the instance, whereas stopping it just powers it down temporarily.
There will be a warning about losing ephemeral storage data, but because this is only a NAT Instance, we don’t need to worry at all.
It takes a minute or two for the instance to stop, and the progress will be indicated in the EC2 console:
Once the instance is stopped, go back to the Actions button and choose Instance Settings | Change Instance Type:
In the drop-list, change the selection to t1.micro:
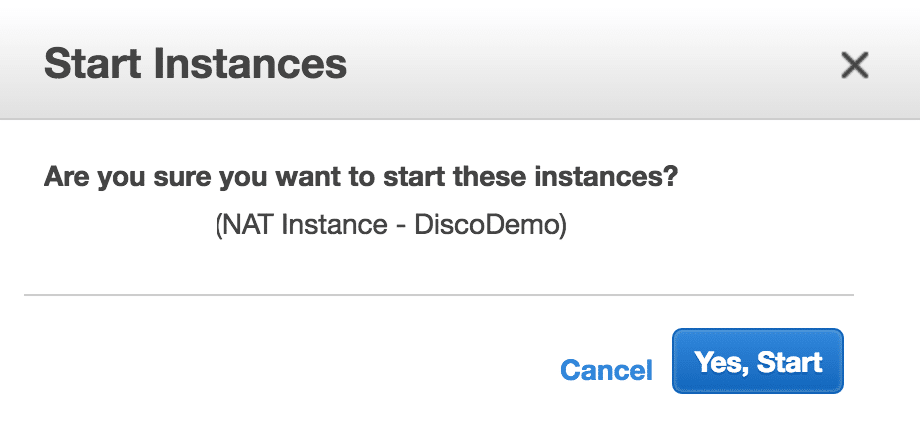
Now, you can start the instance which will start it using the t1.micro flavor size instead of m1.small:
You’ll be asked to confirm starting the instance:
The instance will start up as a t1.micro and will stay that size to save you a few dollars on your instance costs. The only reason that you would need a larger size is if you have serious throughput because each flavor has network and storage capabilities attached to it.
What’s interesting is that the m1 series of instances is what we call “previous generation”, but the other options in the current M3 flavor sizes doesn’t include a small or tiny instance flavor. This is the reason that we may want to opt for the t1.micro option.
Now you are all set with the smallest size and lowest cost NAT instance option for your VPC.


