While I’ve covered this one before with a specific two-step approach to do simple redirect. This will repeat some of those steps with a new domain pointing to an alternate web site URL. This is a real use-case example where I’ve bought a new domain that I want redirected to DiscoPosse.com as the target.
Sample source zone: EricWright.ca
Sample target website: DiscoPosse.com
Using Route53 to Redirect to a New URL
My sample domain was registered with Route53. You can see the registration message here:
A Hosted Zone is created automatically as part of the registration process:
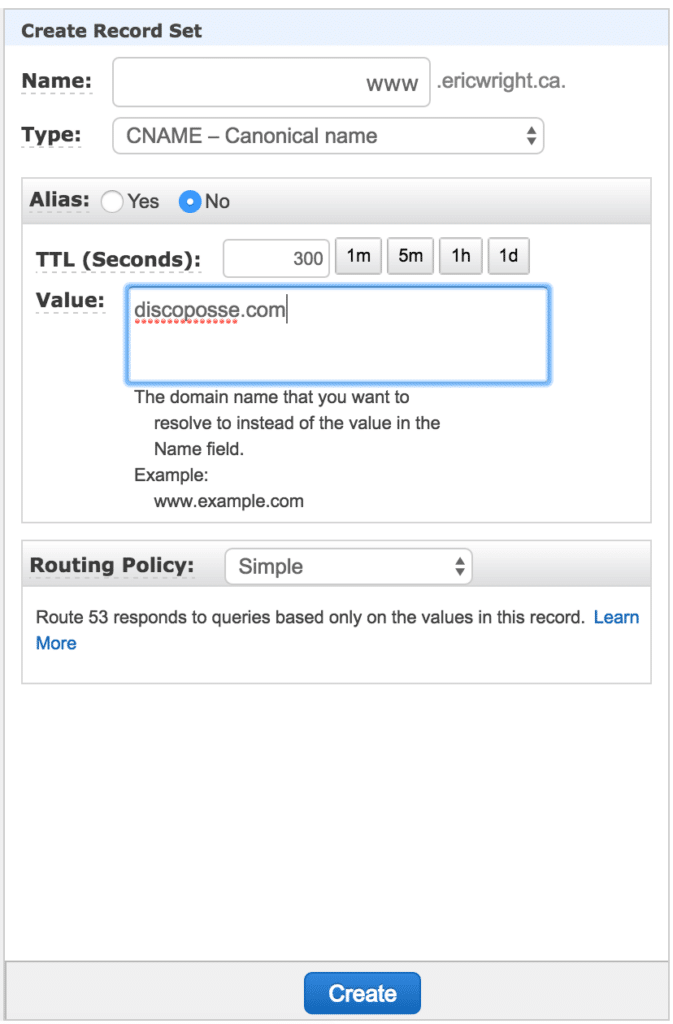
Highlight the radio button and use the Go to Record Sets button. That lets us create a new entry with the Create Record Set button. Because we want to redirect the default www zone, let’s create a CNAME record for that and directly assign discoposse.com in the Value field:
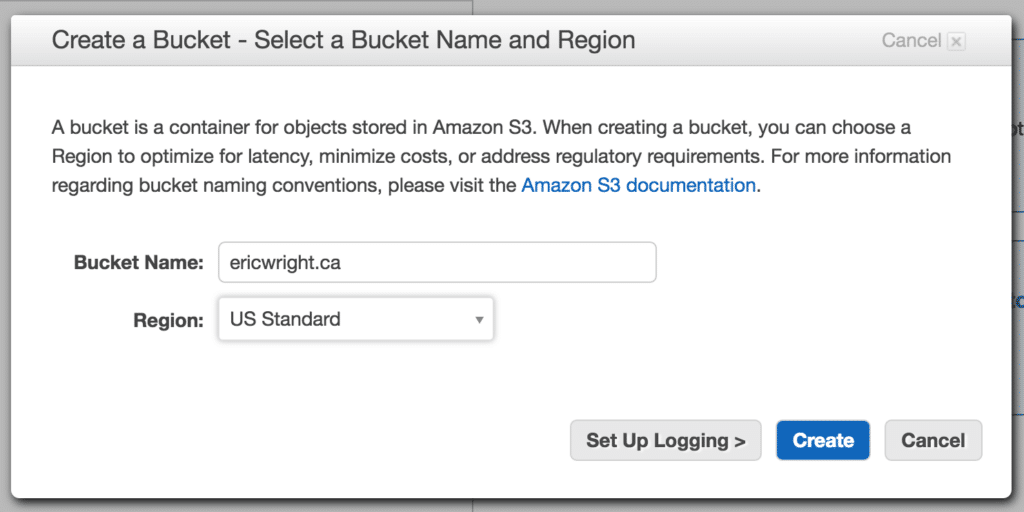
We need to redirect the root domain of ericwright.ca as well, but we can’t use a CNAME for a root record. This means we need to create a S3 bucket for the root zone. Name it after the domain you’re redirecting:
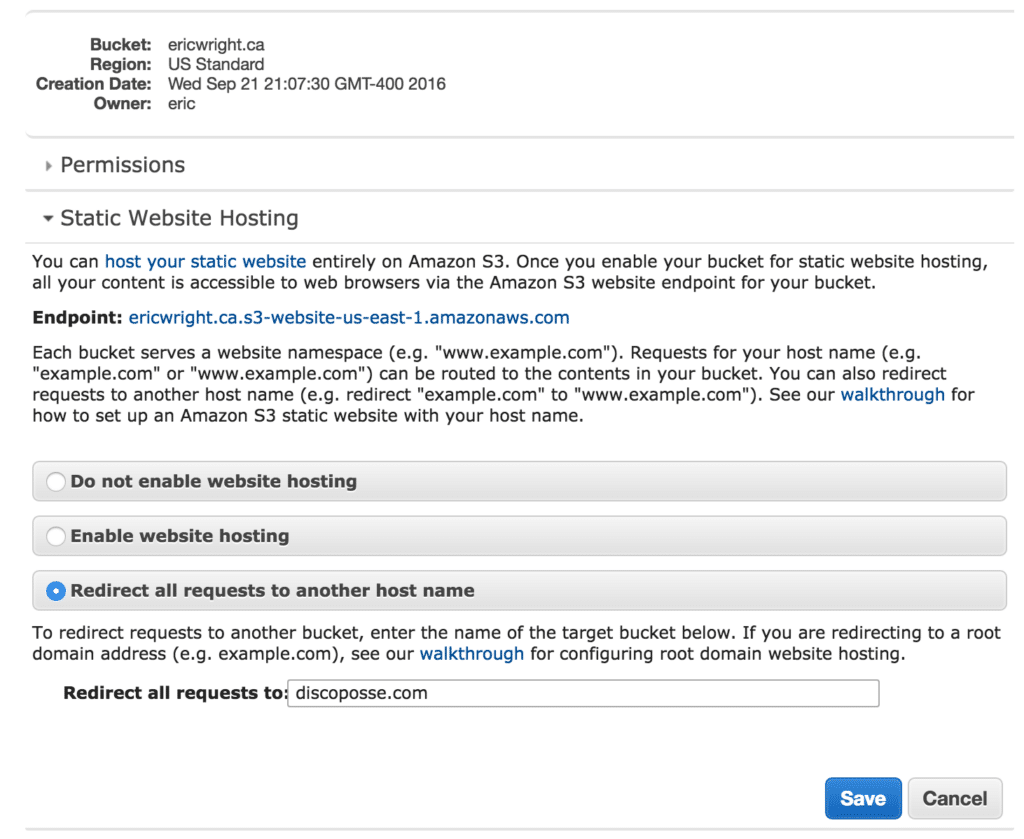
Set up the Static Website Hosting section in the properties window for the S3 bucket, and put the target domain under the Redirect all requests to another host name section:
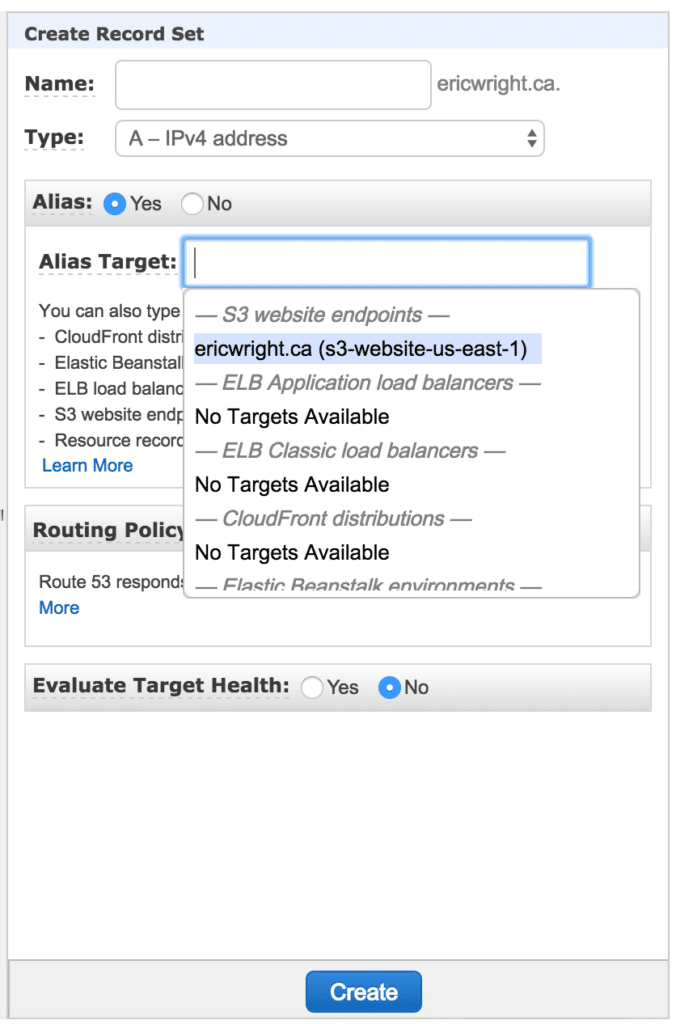
We may have to exit and reenter the Route53 zone to refresh, so once you’re done with that, set up a new A record, click the Alias radio button to Yes, and click the Alias Target field to trigger the drop down list where you can select the S3 website endpoint that matches the domain root:
Wait for a few minutes. 10-15 minutes will ensure that the TTL for the zone and record are passed and it forces a fresh request to the root domain.
Using the AWS CLI (aka AWS Shell) to Query Route53 Hosted Zones
You will need to install the AWS CLI on your machine, or you can also use my sandbox method to run it inside a VirtualBox VM to save installing in your workstation.
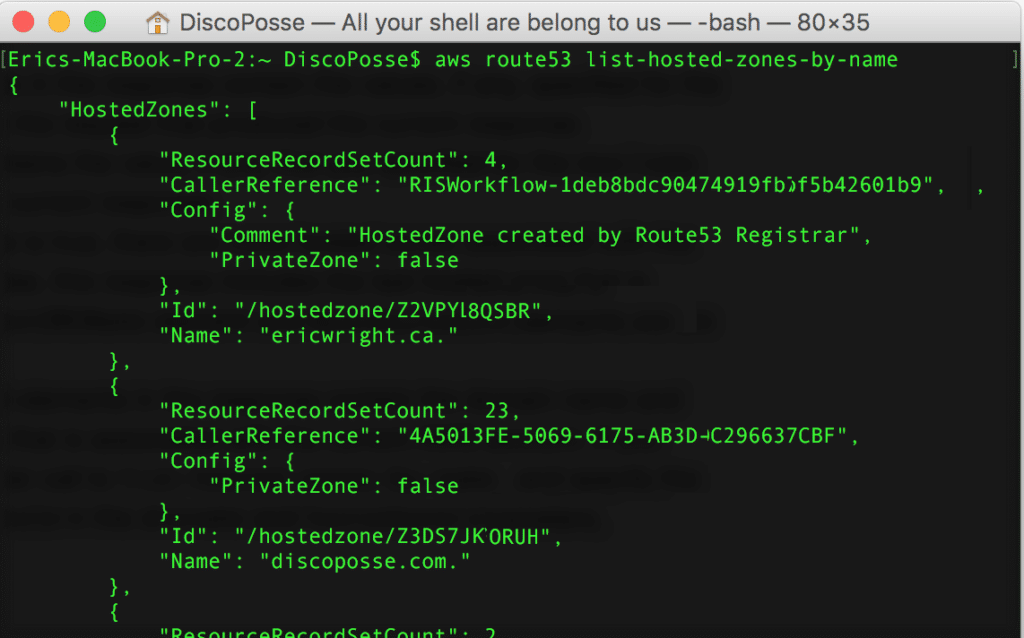
Once configured, we will use the following command to list all of the zones:
aws route53 list-hosted-zones-by-name
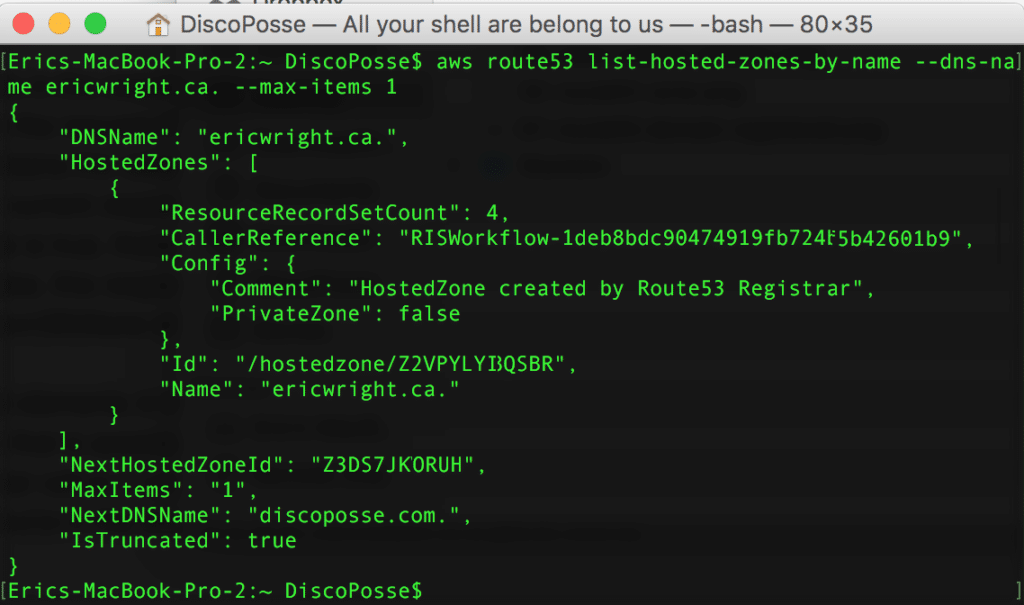
You will see all of the available zones come back. Clearly that is more detail than we want, so let’s add a couple of parameters which will reduce the output to just the zone we want --dns-name ericwright.ca. (note the trailing dot is important). That still returns a series of zones, so we also add the --max-items 1 parameter as well:
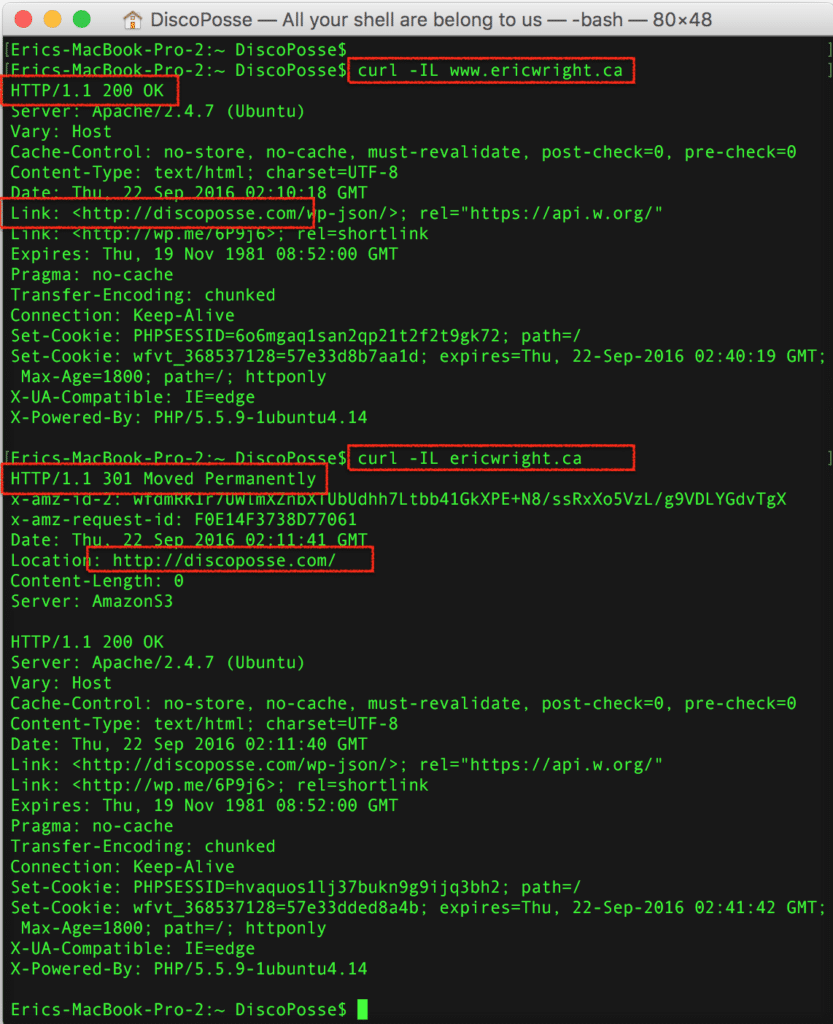
We can confirm the redirects using the cURL command for both domain names using the cURL command and the -IL parameter to show the HTTP response details:
In our next post, we will be doing some DNS record management using the AWS CLI to emulate the changes we did in the GUI in this article.


