

Now that we’ve gotten Rancher up and running from our first post, it’s time to take the next steps and configure our first host. We are going to run Rancher pointing to the same host that we are running Rancher on. That may seem like some sort of Docker inception thing, and definitely not the recommended way to run in production, but it’s a great way to test the waters on how it will work.
Adding your First Custom Host in Rancher
Using the Rancher UI, we can add hosts by clicking on the Infrastructure menu which brings you to the Hosts view. We will select the Add Host option and in the dialog, make sure to click the Custom provider at the top.
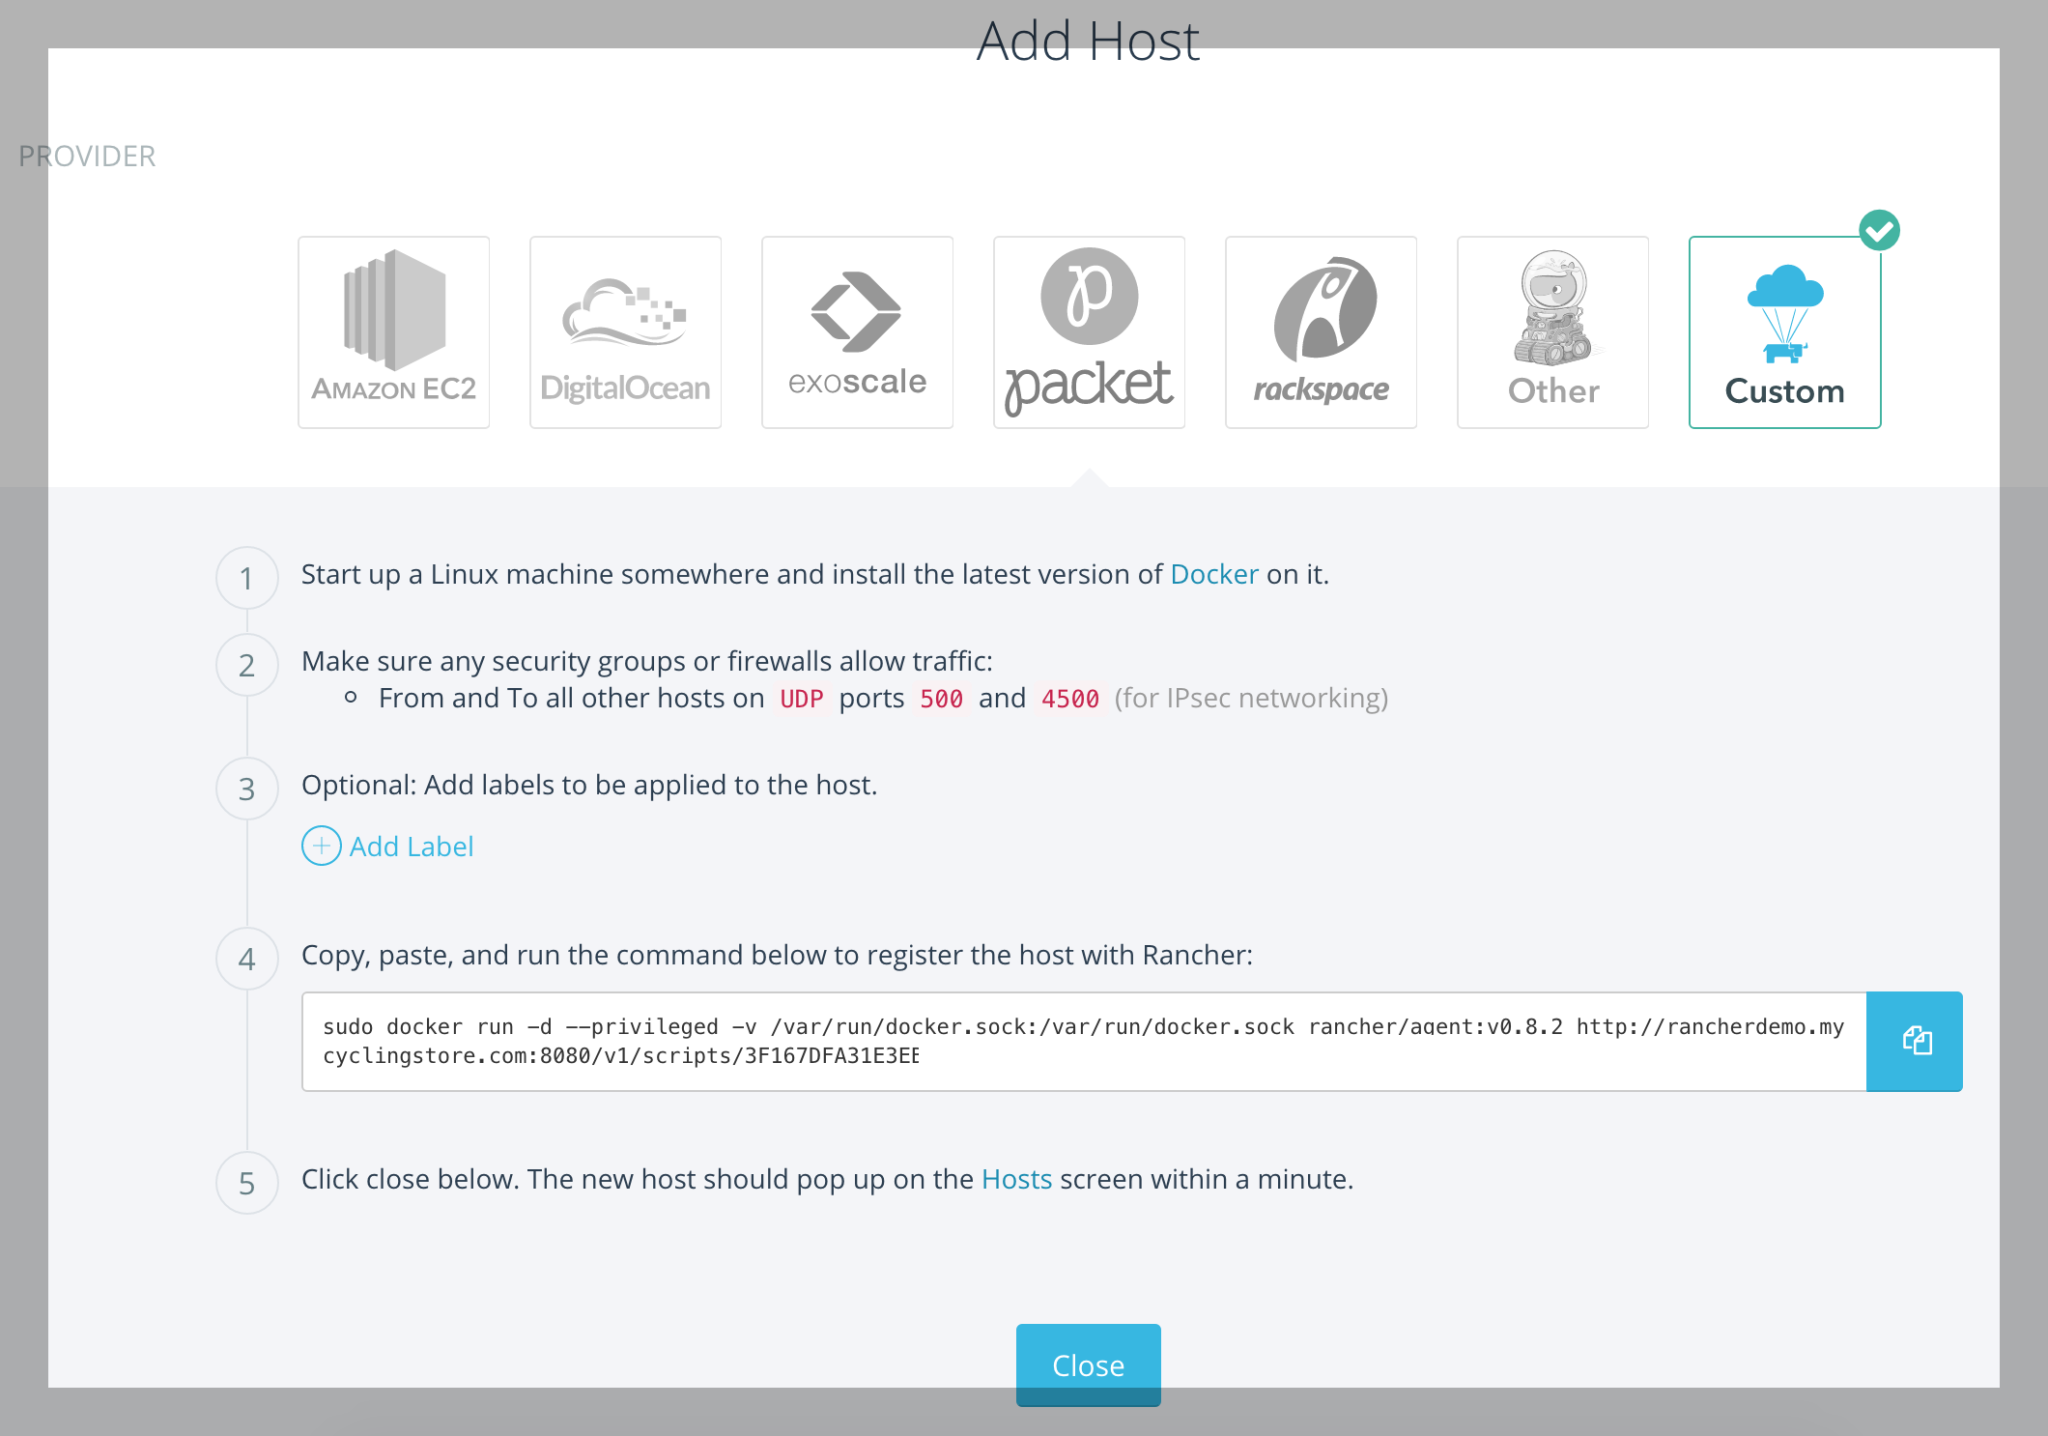
The instructions for adding our custom host are neatly laid out for us on the page, so our next step is to jump to number 4 on the list. Highlight and copy the code on the instructions page which we will paste into the console of our host:
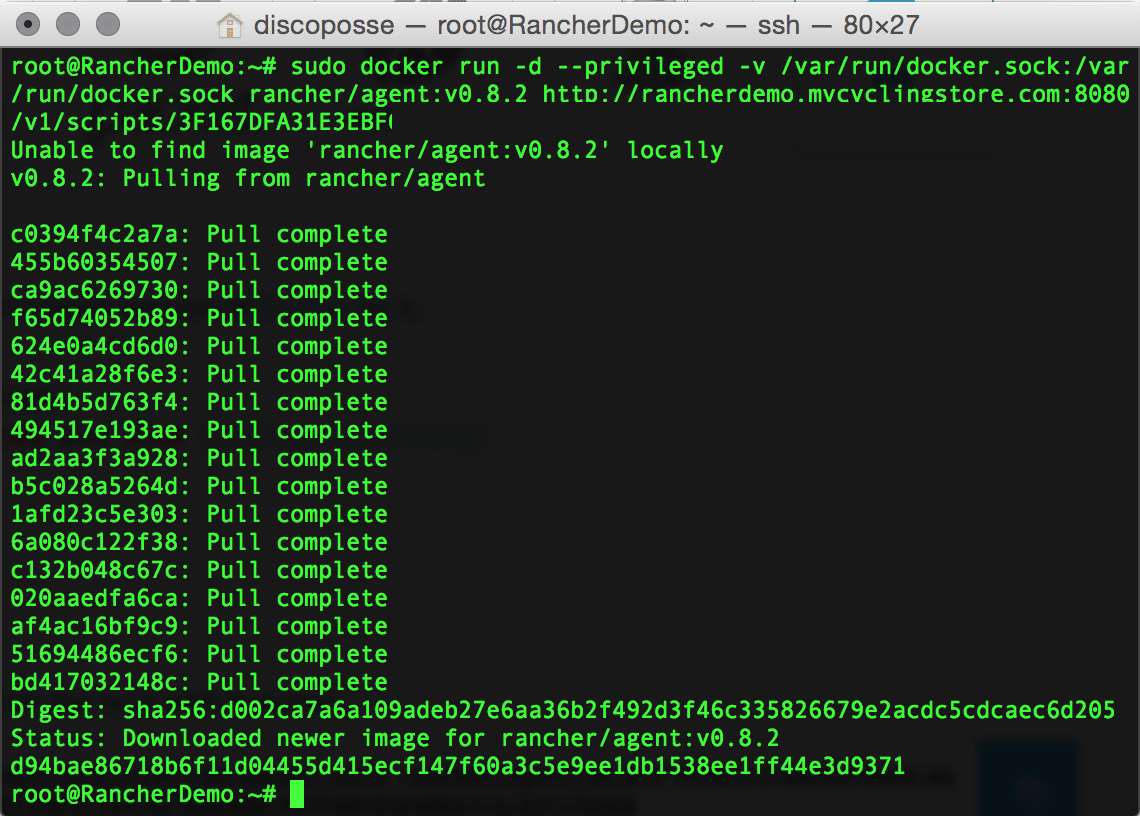
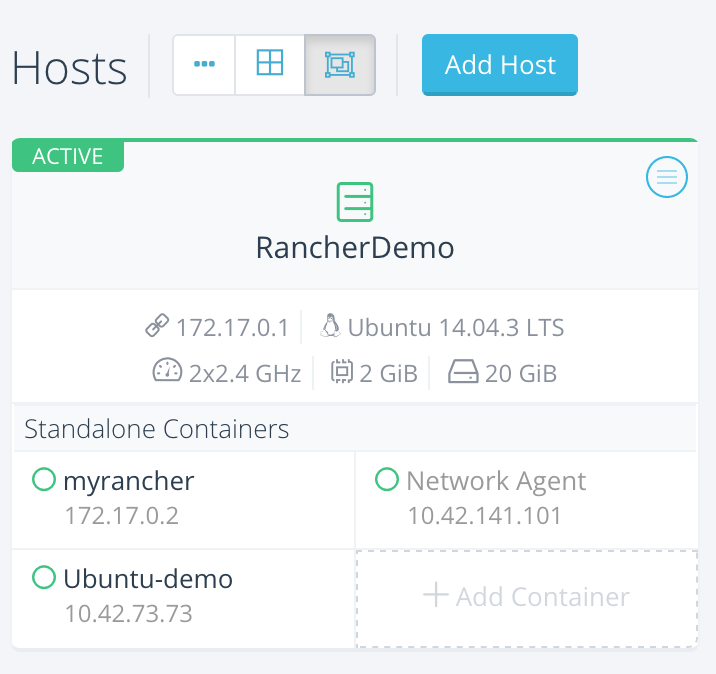
That command will pull the Rancher agent container and spawn it onto the host to connect it to our Rancher environment for us. After a few moments, you will see the RancherDemo (or whatever your demo machine is named) appear in the Hosts view.

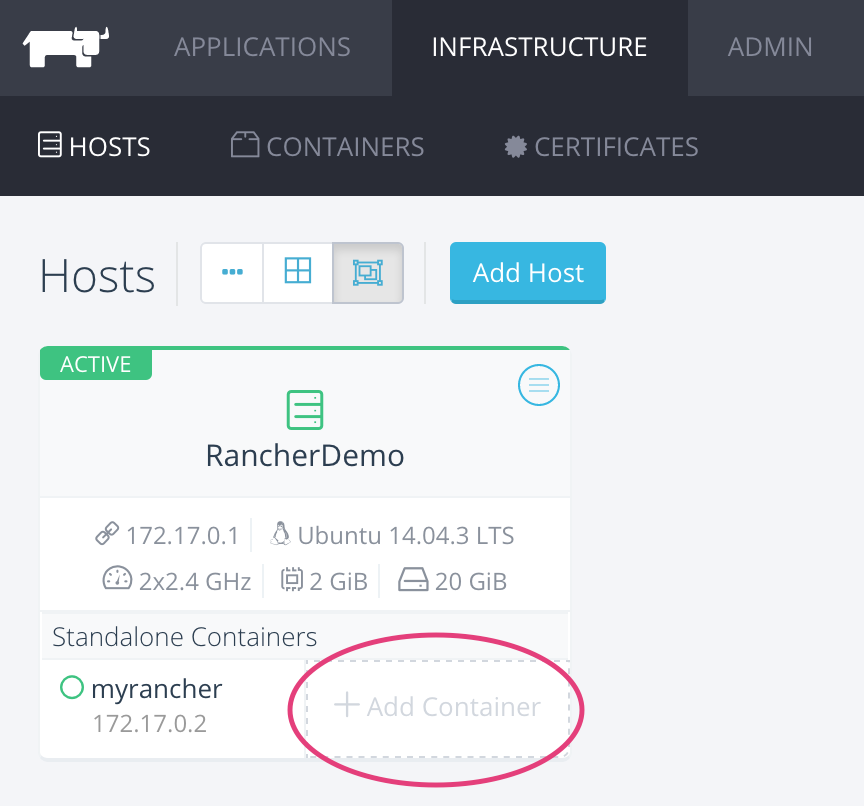
Now that we’ve added our host, we can see that there is already a standalone container running that has been detected. It’s our Rancher UI container running on the RancherDemo host. As you can imagine, it’s not a good idea to mess around with that one, so we will move on to test out Rancher in a few other neat ways.
Time to get started with some more Rancher goodness. The first thing we will do is to create a new container on the host to test that workflow out. Using the Hosts view, click the Add Container section:
This will bring up the new container dialog with some options we can apply to our container. We will start in the shallow end of the pool and work our way up. Let’s just name the container and pick the ubuntu:14.04.3 container in the Select Image option. There will be only one image to choose from because we used the Ubuntu image to build our initial Rancher container.
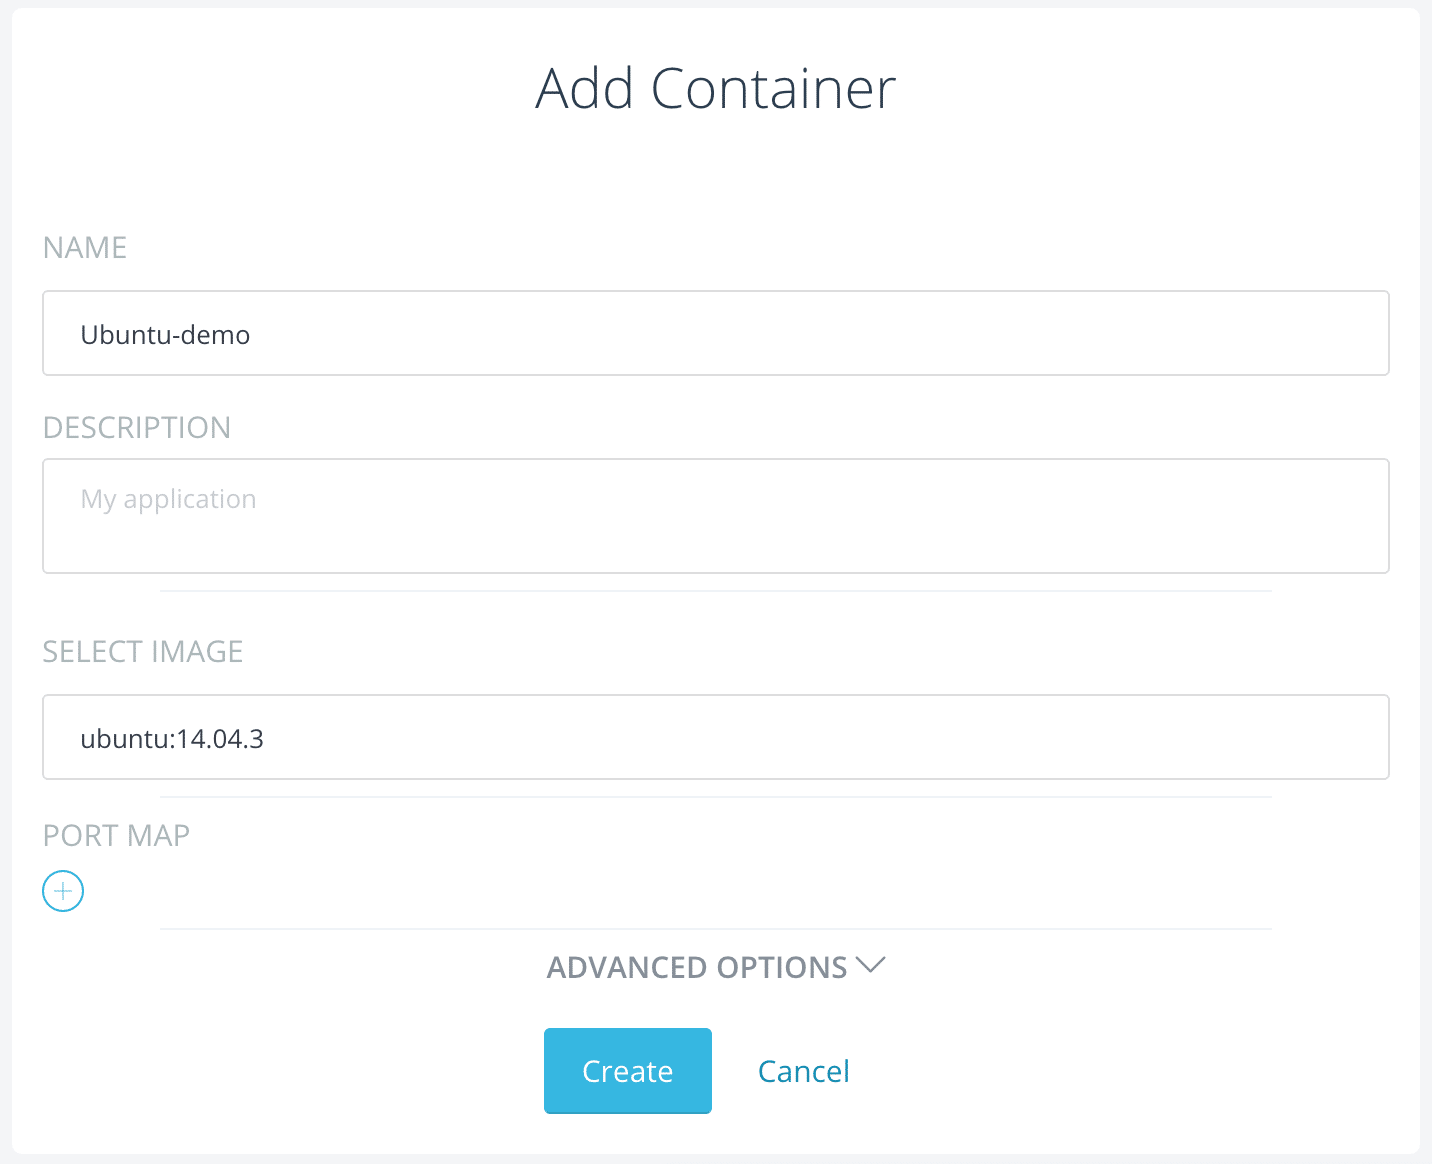
There are a number of other advanced options, but we will explore that later on in another post. Now we will be put back to our Hosts view and you will see the container build. As the first container is built, another container will also appear called Network Agent. This is the networking container that sets up the container networking including routing and DHCP options.
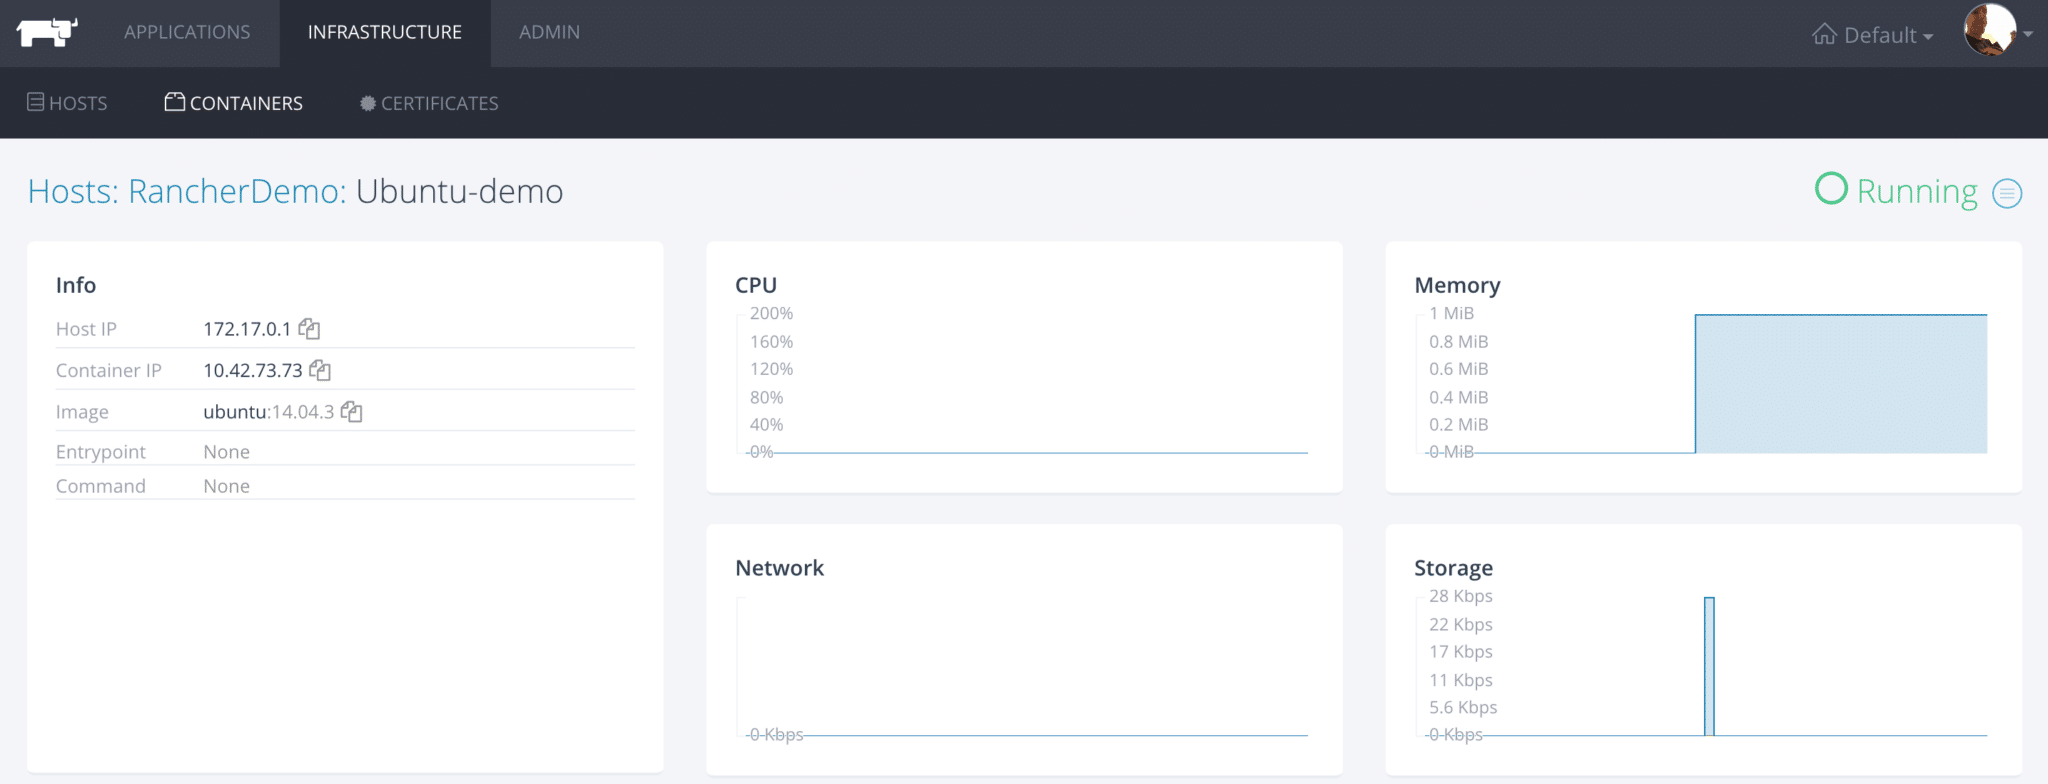
You can click the Ubuntu-demo container in the Hosts view and it will bring you to the details pane with a number of charts showing IP address information, and some performance statistics in the active graphs.
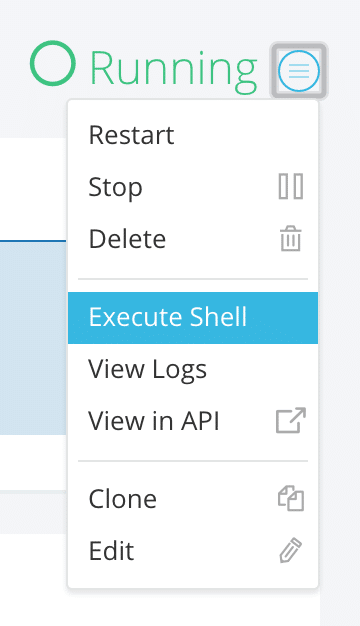
In the upper right area of the details page, you can click the icon next to the state display, in this case where it says Running:

The options here include the control options to start, stop, delete, and also to clone, view logs, and view in the API screen. For our quick example, let’s select the Execute Shell:
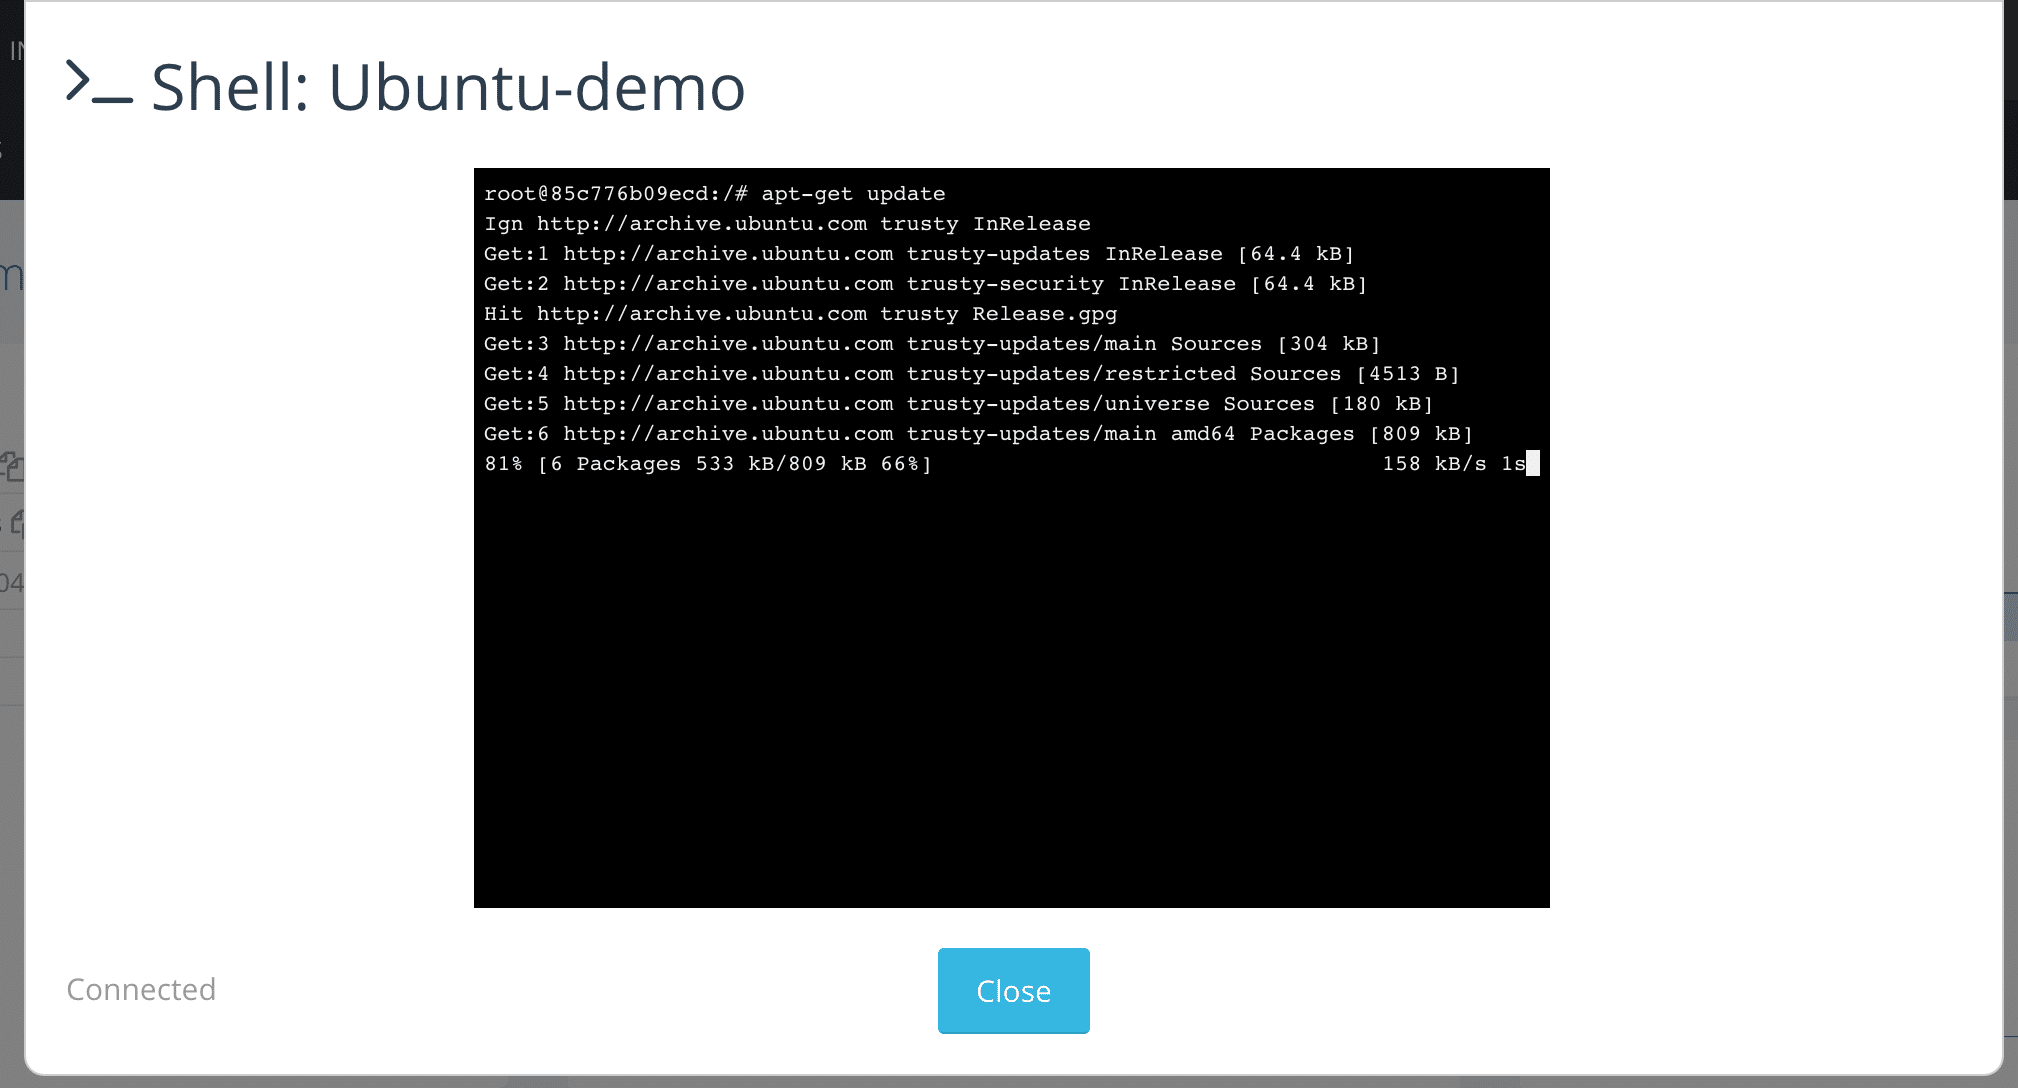
This brings up the console of our container, in this case running Ubuntu server and logged in with root privileges:
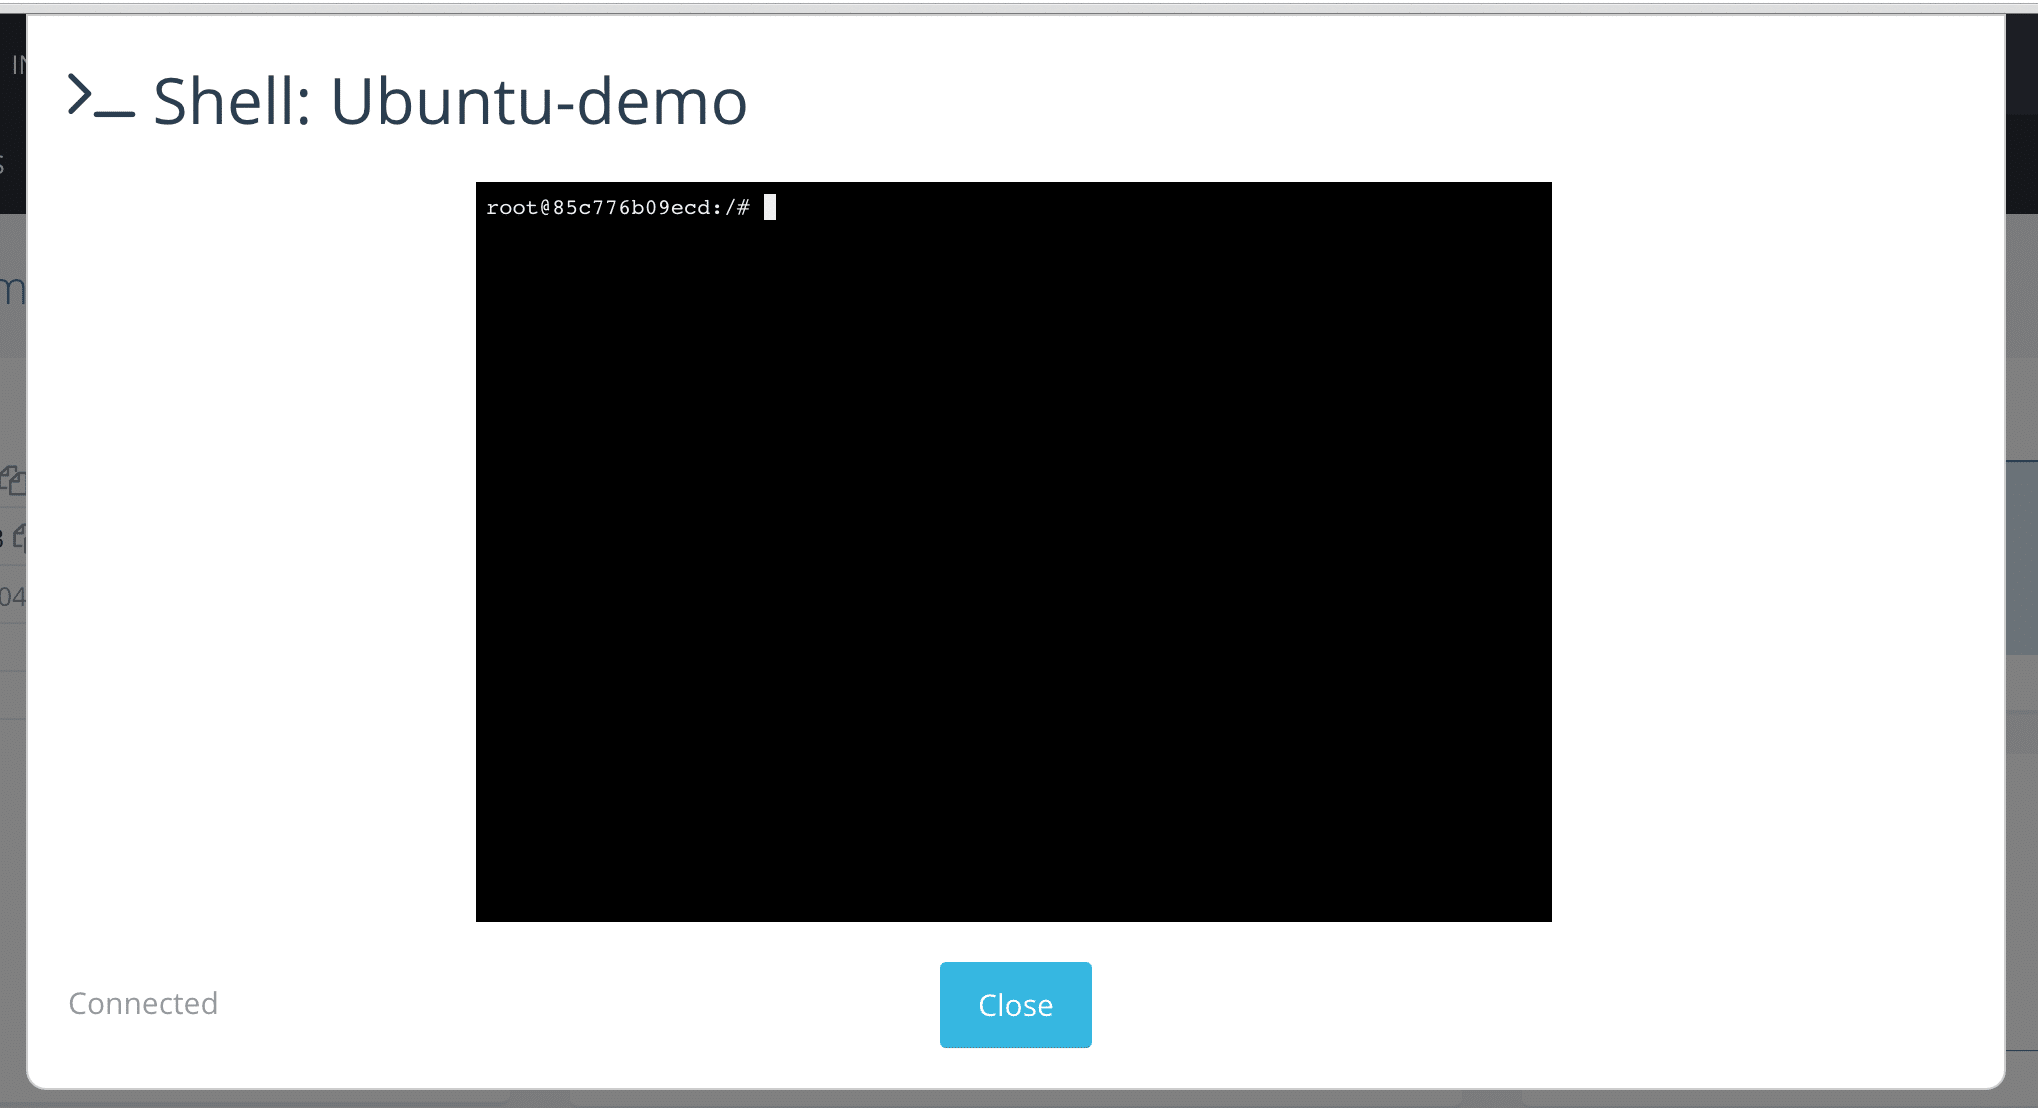
You have complete operational access just as if you had a full virtual machine. This isn’t really news, but it’s still pretty cool when you run apt-get inside a container that took a few seconds to launch:
Next we will close the shell and go to the Containers view on the Infrastructure tab. This is where we see the containers on our Rancher environment with details including container state (running, stopped), the container name, IP address, image name, and also any active command that is running.

Click on the RancherDemo container name which will bring you to the details view for that container. As you can see, there is more information here:
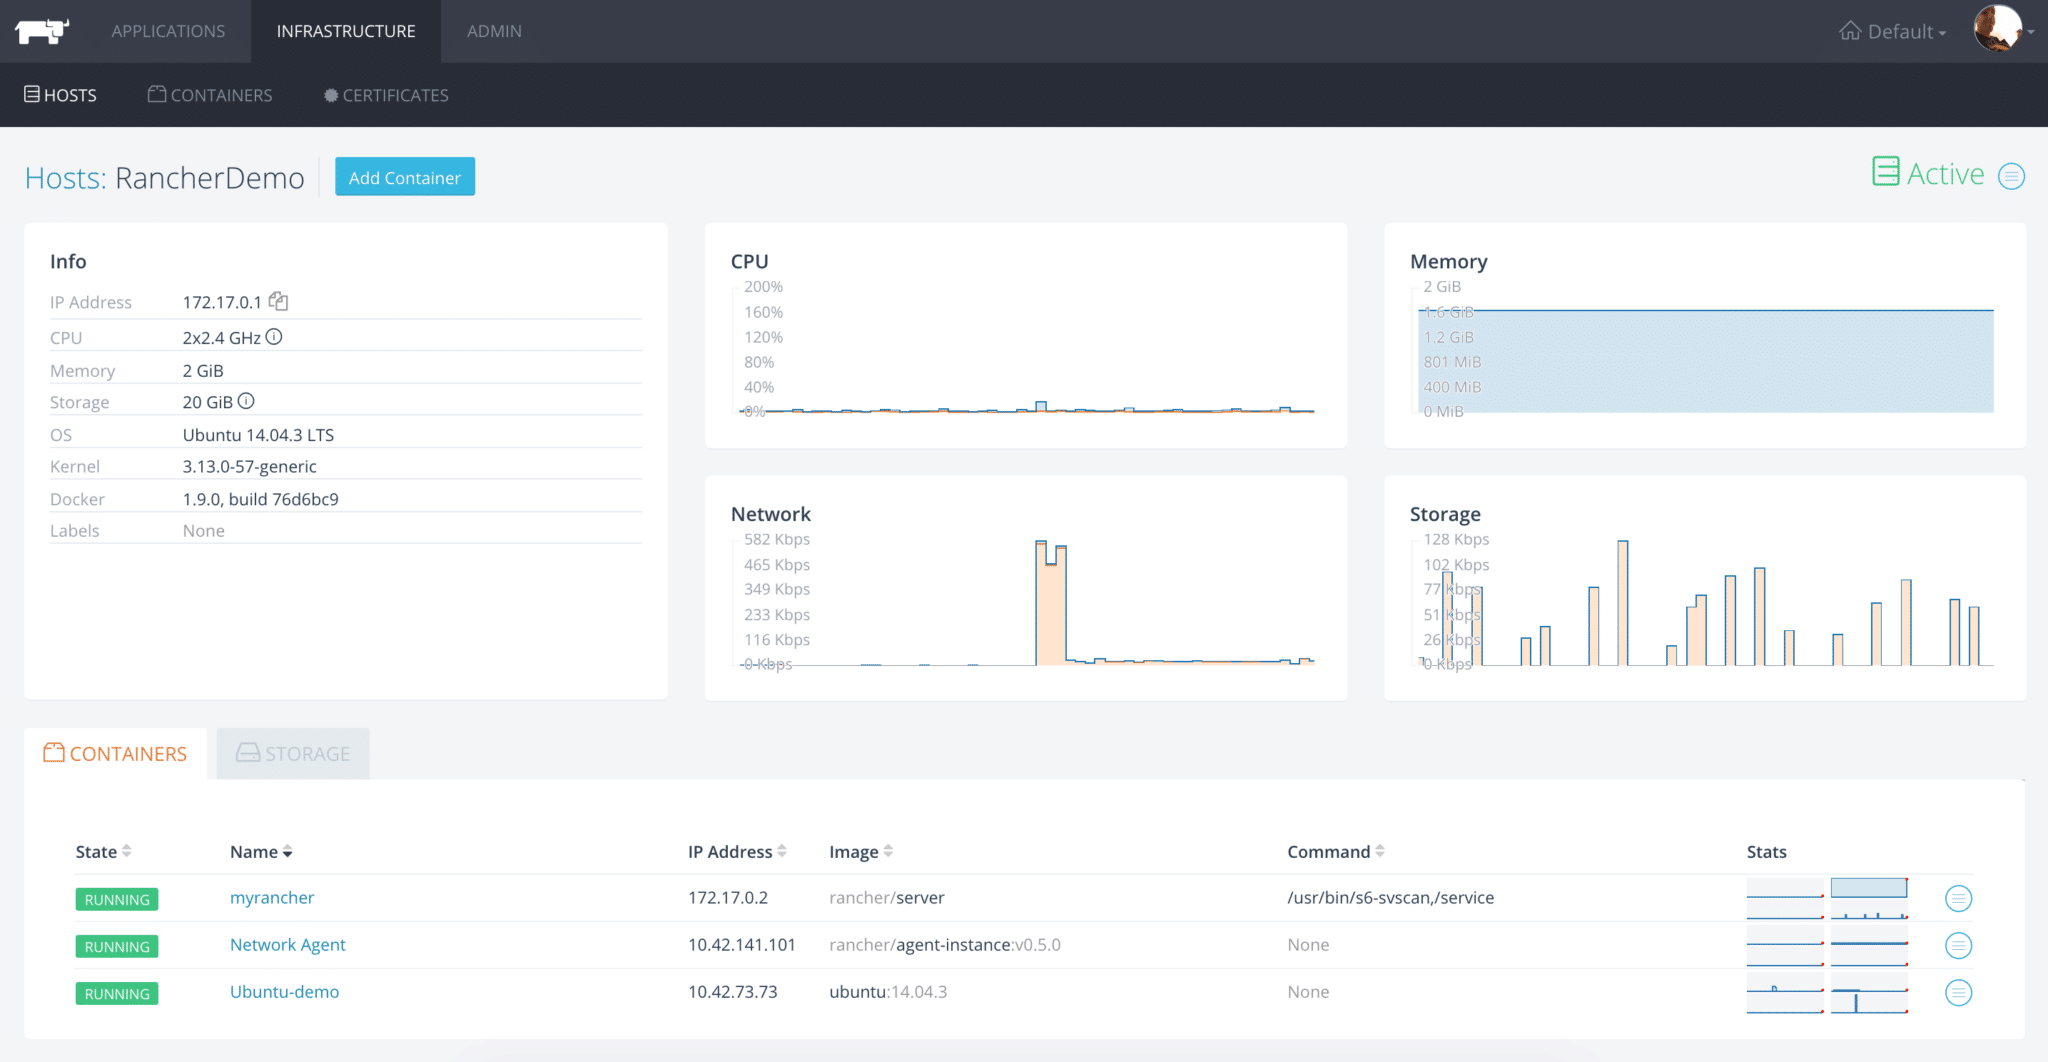
The Docker details appear in the Info box, and because it’s a Docker host, you can see the list of containers at the bottom of the details view. This is a handy way to navigate around the UI because each entity has details and drill-down capability based on the context of that entity.
Thinking at the Application Layer
The joy of moving up the stack is that Rancher lets you see multiple layers, and to build out applications within your container environment. Remember that the whole purpose of all of this infrastructure is to enable the rapid deployment and simpler administration of applications.
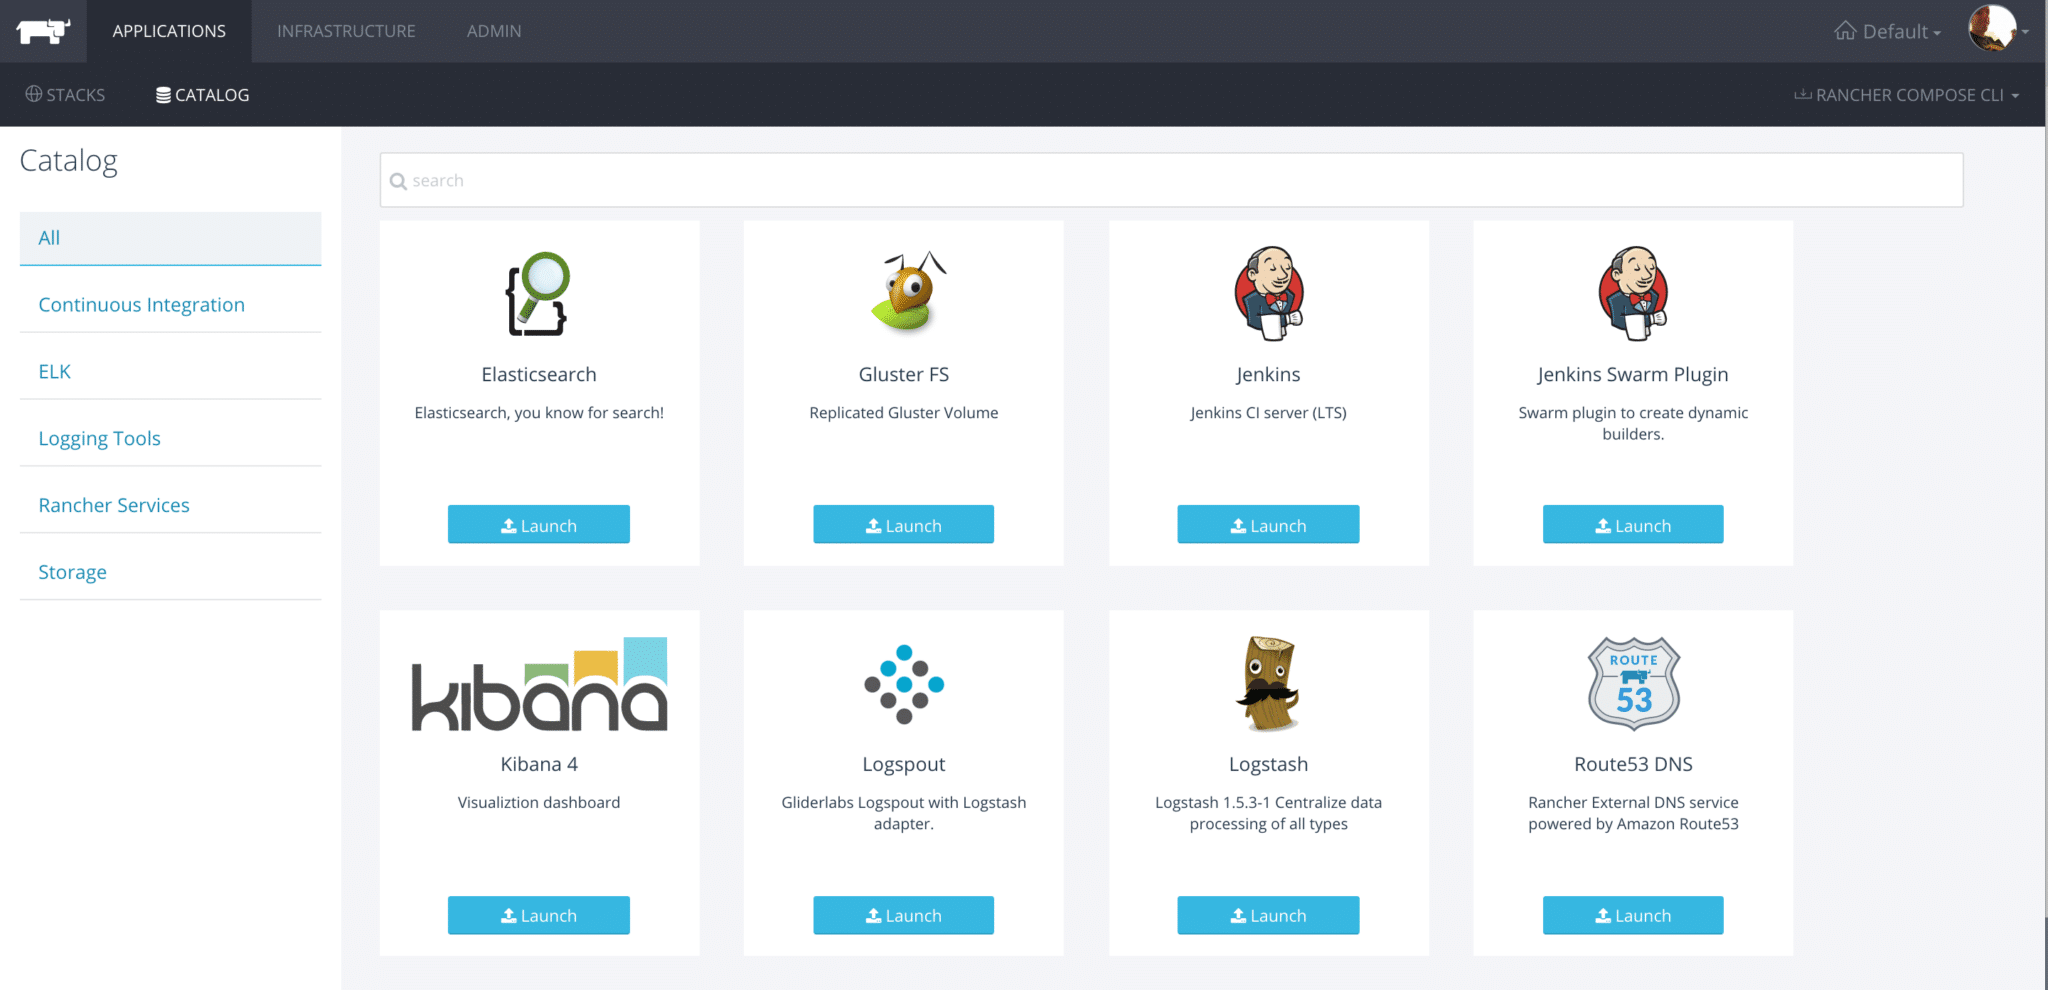
By clicking on the Applications menu at the top, and then the Catalog view in the secondary menu, you can see the Application Catalog that comes baked in with Rancher:
I know that your eager to keep going, but that’s the end of this post. If you want to click around the interface, I would recommend that. It’s good to be familiar with the various options, but don’t worry, we will also walk through lots of the features and views in the upcoming posts in this series.
What’s Next?
We have a limited number of containers and applications, so the next thing we will do is to connect the Rancher environment to the DockerHub to be able to pull down some other images and extend our testing a little bit.
1 thought on “Rancher Part 2: Adding a Docker Host to Rancher”