

For those who want to try out the Cisco UCS Platform in a test system, you have a great option available to you which is the Cisco UCS Platform Emulator. This can be downloaded and run using VMware as your host. You can use VMware vSphere, or you can also run this on the very popular and powerful VMware Workstation.
Not only can you test out the UI and run through configuration scenarios, but you can actually import and export configuration files to and from your existing UCS environment. How cool is that, right?
Even with the existing features supported with the previous version, you have a number of fresh new features in the new version 2.2 (1bPE1).

The download of the UCS Platform Emulator is available in OVA format, or as a set of VM files. For our example here, I have used the VM files download which is appropriate for VMware Workstation. If you wish to use on VMware vSphere, you can download the OVA instead and use the Deploy OVF Template… option in the vSphere Client or vSphere Web Client.
Getting the Cisco UCS Platform Emulator
As new versions have become available, Cisco has kindly updated the platform emulator to match the currently supported version that ships with their versatile UCS environment. I’ve been running the emulator for a while with the previous version, but now is the right time to provide a quick ground-up walk through of deploying the new version.
Main download page: https://communities.cisco.com/docs/DOC-37827
Docs and VM download page: https://communities.cisco.com/docs/DOC-37897 (Requires Cisco.com username)
The download files show right on the page, and once you log in with your Cisco.com credentials, you will see the VM file link:

Make sure that you download the User Guide while you are there to keep handy for reference. As mentioned above, you can also download the OVA file using the link at the bottom of the file selection.
UPDATED: Chris Wahl (@ChrisWahl) did a great video to show the download process. The video is shown below and the original post is here: http://wahlnetwork.com/2014/01/11/download-ucs-platform-emulator/)
Installing the Cisco UCS Platform Emulator with VMware Workstation
You will get your VM files once you unpack your ZIP file which include everything you need to load into your VMware platform.

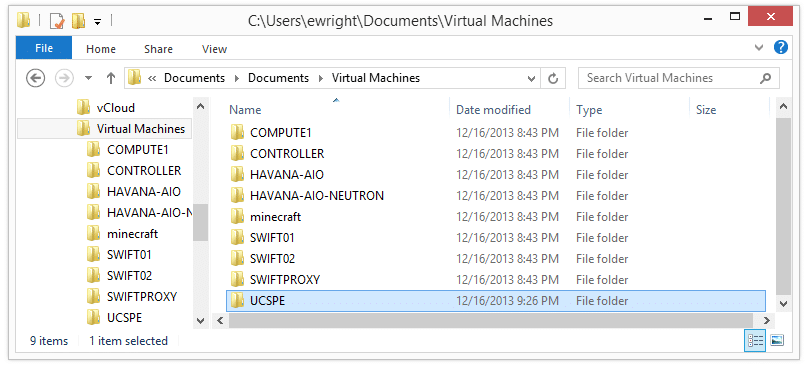
For our VMware Workstation deployment, you can simply copy your VMware Workstation folder which is usually c:usersyour-usernameDocumentsVirtual Machines.
Just copy the root folder (UCSPE) to the appropriate destination:
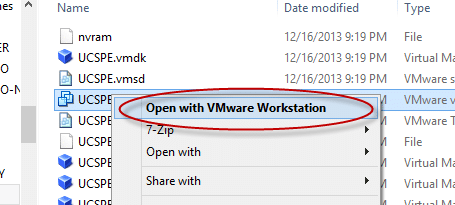
Now, you can open the folder and right-click on the UCSPE.VMX file, then select Open with VMware Workstation:
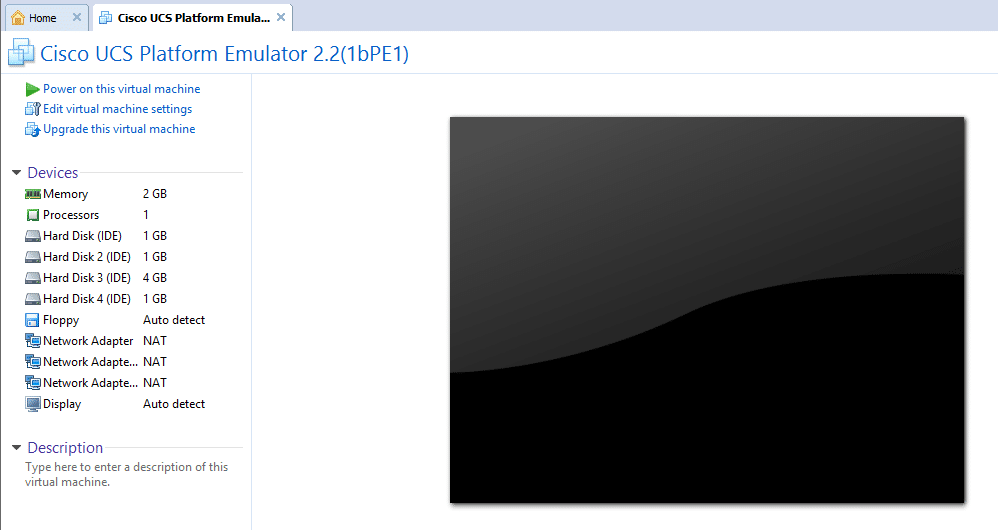
Now you will see your newly added machine in your VMware Workstation console:
It’s almost too easy 🙂
Next you have to just power on the machine and you will see the console show the progress as it boots up. NOTE: When the machine is first powered on, you will see a “press any key to continue” in the console. Just click into the console and press a key to trigger the boot up.
The first boot will take some time as the emulator unpacks and installs. Don’t worry, it will come up in due time and future boot ups will be much quicker.
Once the boot process is completed, you will see the console at the login prompt:

You will see the login information on the screen. Write that down just in case, or take a screen shot (or just bookmark this page) and you will also see the all important UCS UI address at the top of the console, which in this case is 192.168.79.147 in my instance.
Using your internet browser, you can open up the web UI at the address provided:

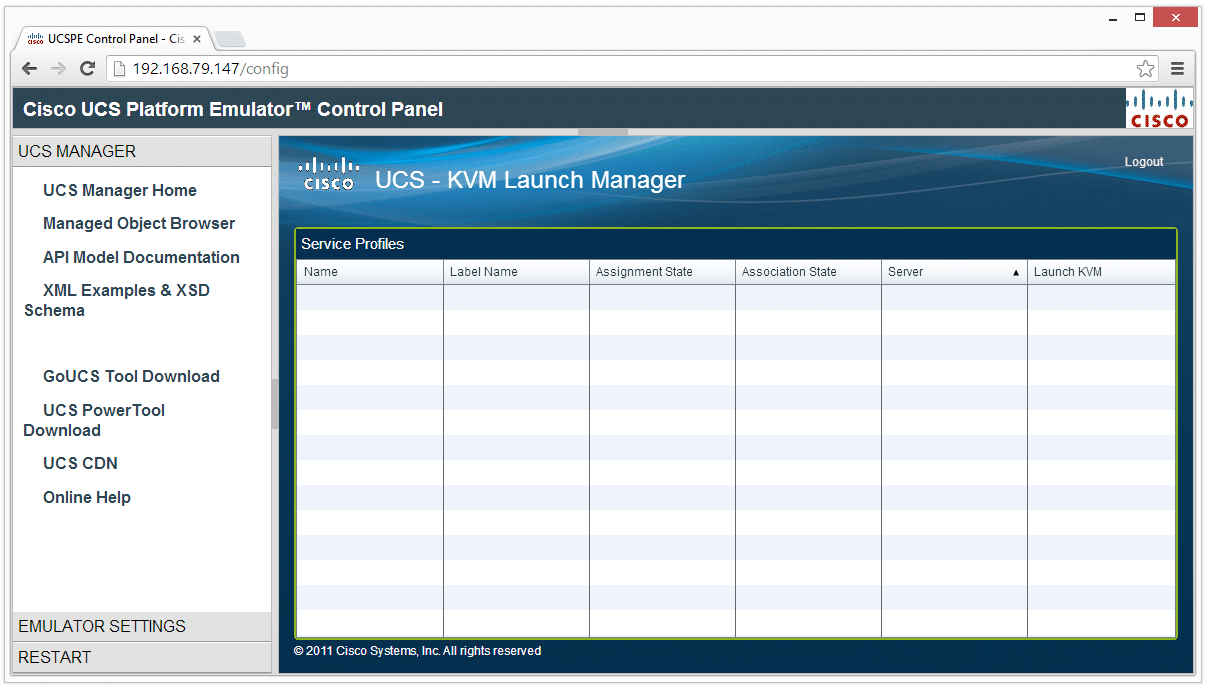
Using the links in the web UI, you can launch the UCS Manager or the KVM Manager now using these buttons, and you can also click on the left hand pane to the Emulator Settings option to display the configuration screen for the overall UCS Platform Emulator environment:

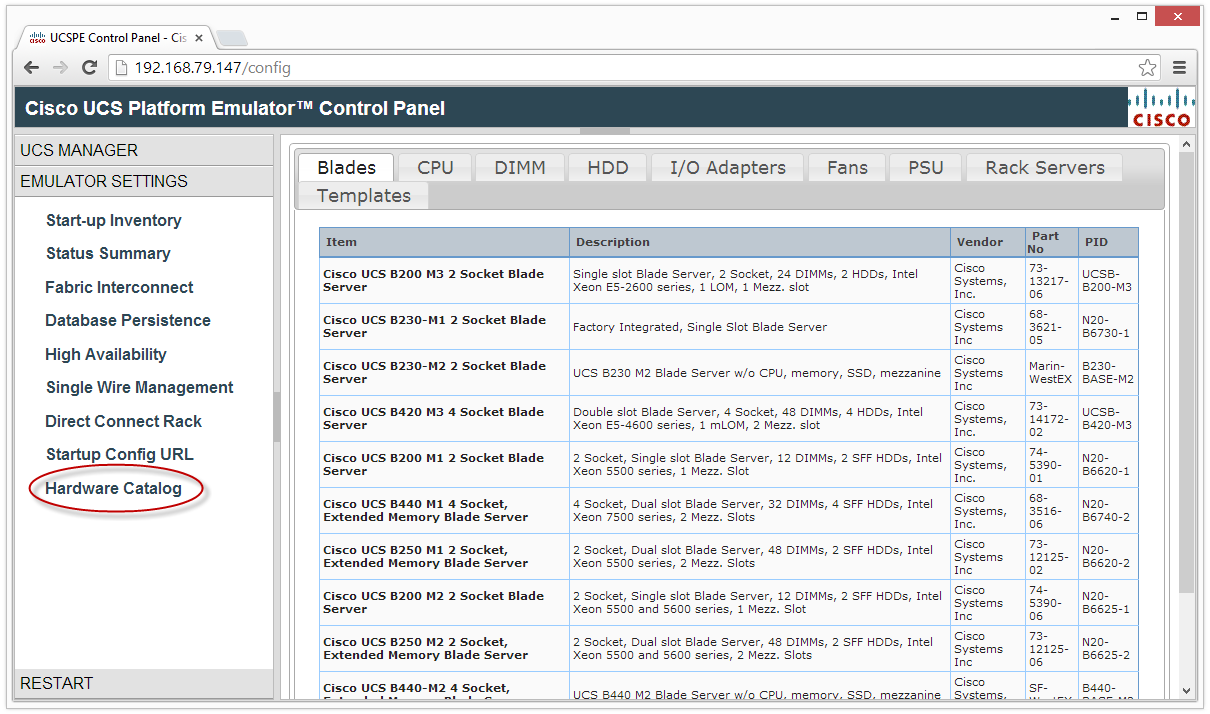
Adding virtual devices to your UCS is as simple as dragging and dropping from the catalog of products below up to the Stash and you will then see them in your overall configuration platform.
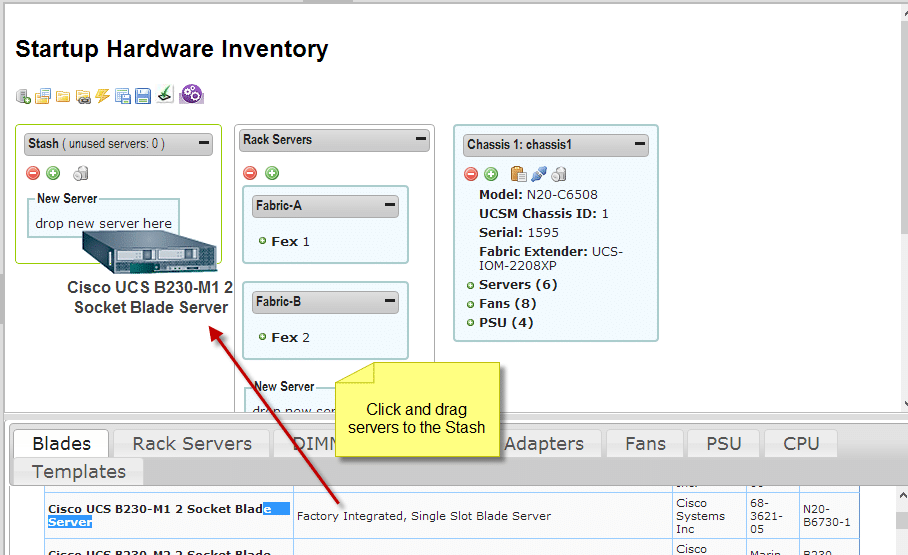
With this kind of flexibility, you can see all of the features, functions, and limitations of each of the physical components of a UCS system without having to have bare metal hardware in the data center.
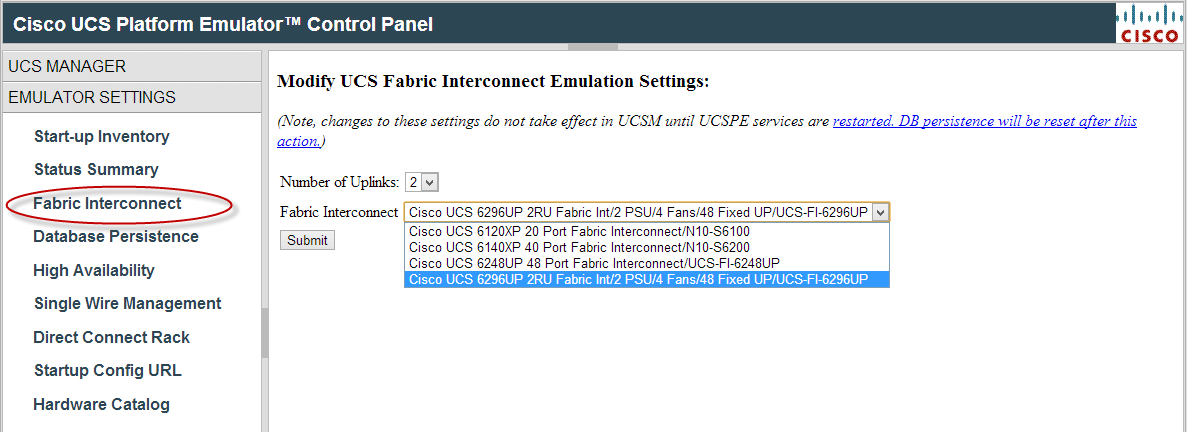
If you click through the various links on the left hand pane, you will see a significant number of configuration options. There are as many options for our virtual UCS as there are in a physical UCS platform with every possible configuration.
Fabric Interconnect
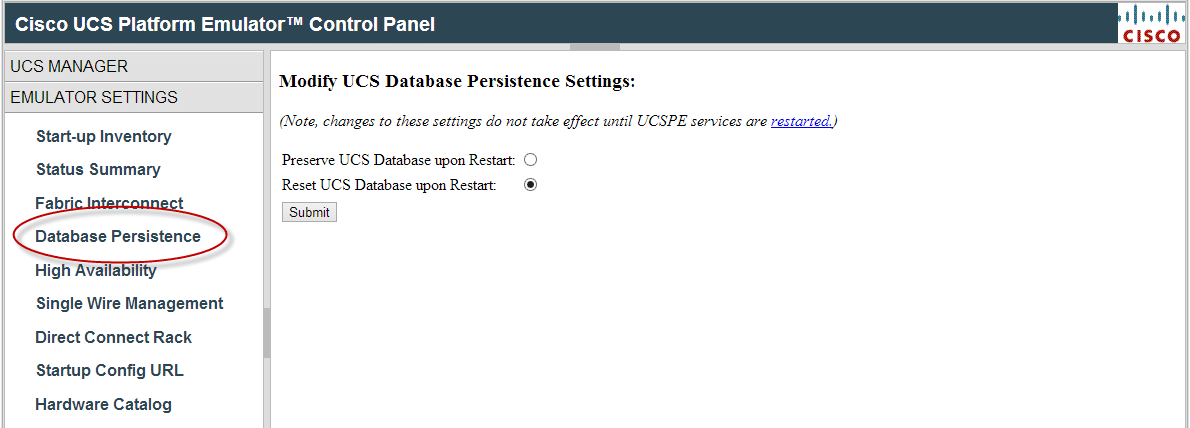
Database Persistence
This option lets us choose if we have our UCS Platform Emulator go to factory reset on each boot up, or to preserve the configuration for multiple boots for longer term use:
High Availability
You can even configure the HA options:

Single Wire Management

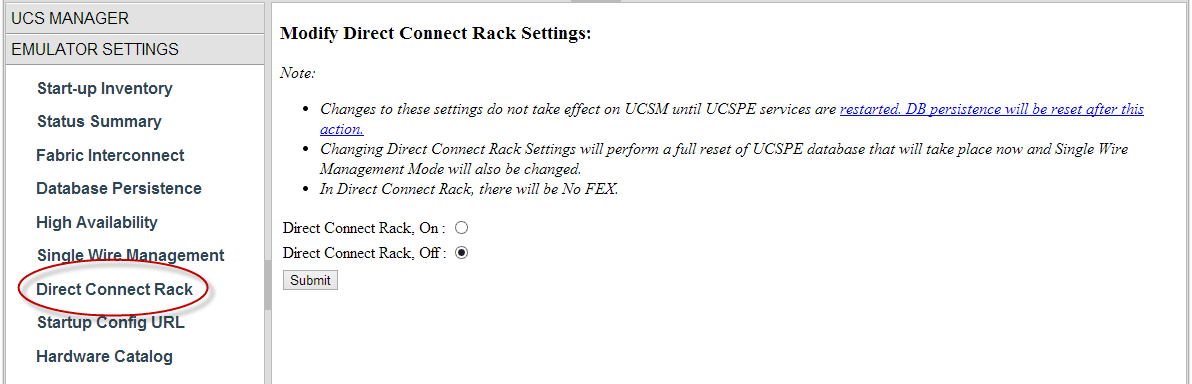
Direct Connect Rack
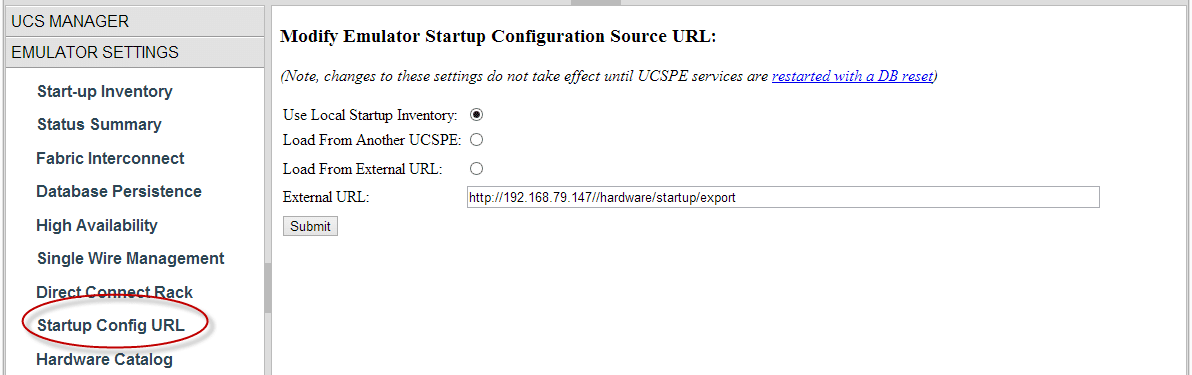
Startup Config URL
You can set up the startup configuration URL to an existing, or the local URL:
Hardware Catalog
How would you like to have an unlimited shopping cart of Cisco hardware for the UCS platform at your fingertips? Guest what comes with the UCS Platform Emulator? 🙂
UCS Manager
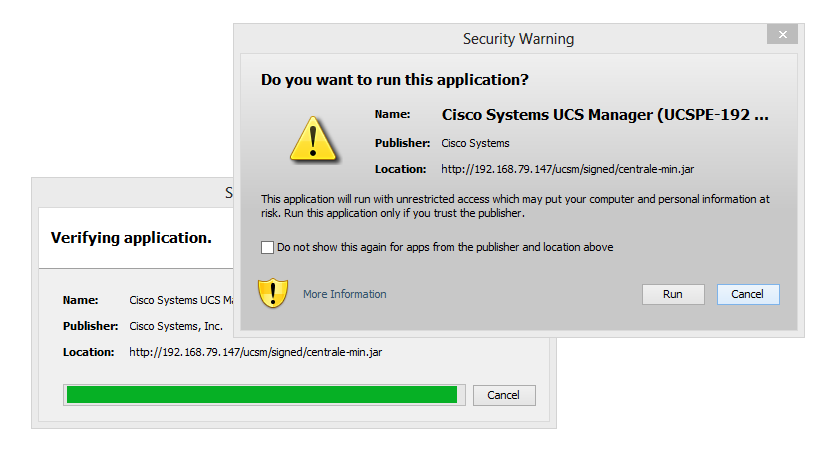
The UCS Manager will require Java to be installed (boooooo!), as will the KVM Manager. For users of Google Chrome, the UCS Manager will launch a download of the Java launcher and you can initiate it by clicking the downloaded file.
The usual array of Java warnings has to be accepted to get into the interface of course:
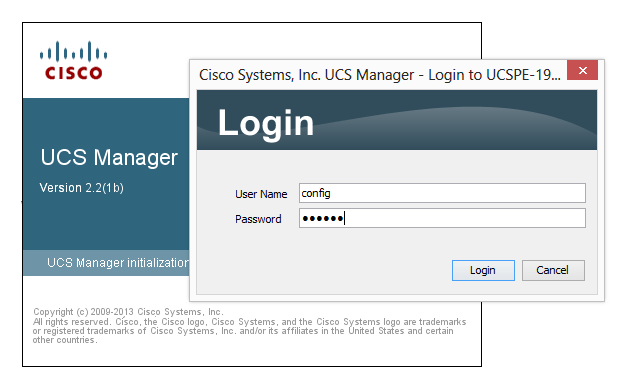
Once you are presented with the login screen, you can use the username of config and a password of config which is the default administrative user:
Once you’re logged in, you will be in the UCS Manager interface:

Inside the UCS Manager screen you can click around to your heart’s content and fully manage your virtual UCS platform
KVM Manager
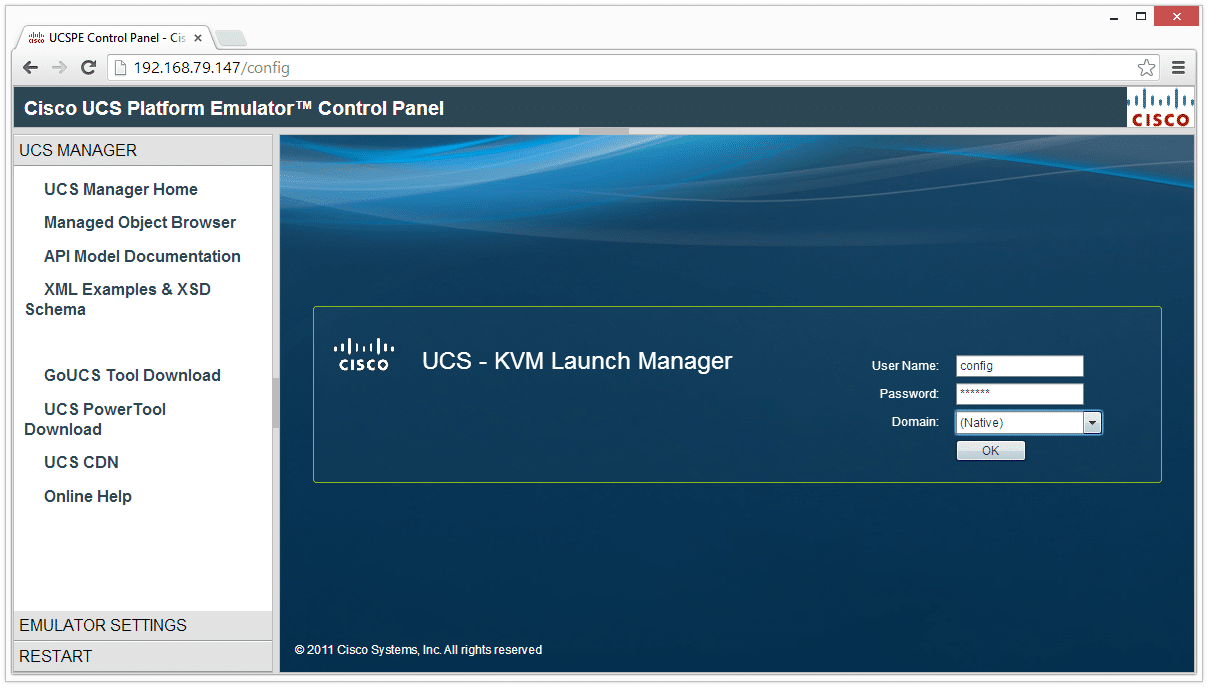
The KVM Manager will be accessed right in the UCS web UI and the login screen will need us to use the same credentials which are username config and password config but we also need to select the domain of {native} from the drop list:
After you are logged in, you will see the main KVM Manager screen:
It’s rather unexciting because we are seeing after the first launch with nothing in our UCS platform.
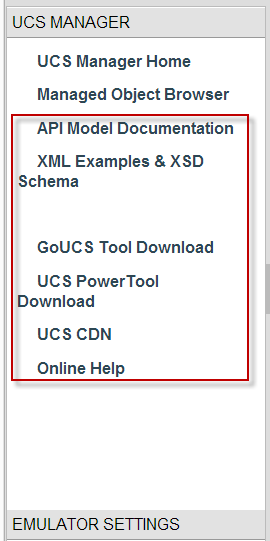
More Tools and Help
In the left hand pane of the web UI there are a number of links to tools and help files for the UCS environment.
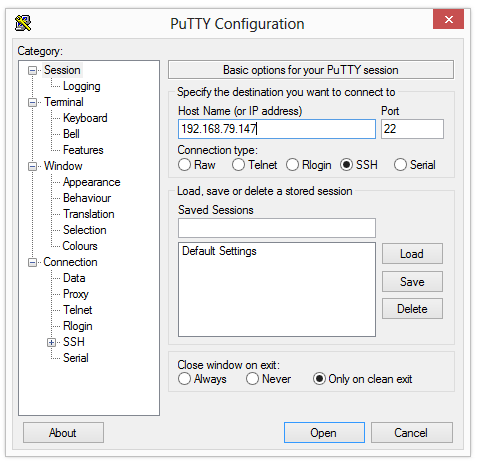
Accessing with the PuTTY SSH Client
Rather than using your virtual console in VMware Workstation, you can also launch a remote shell session over SSH. I’m a fan of PuTTY myself, and the configuration is super easy. Just launch PuTTY and type in the IP address that your UCS Platform Emulator is on:
Remember from your virtual console that there are two users provided for console login. The importance of this is that one user (User: config, Password: config) is only for console access, and the second (User: clisuser, Password: cliuser) can be used locally on the console and through the SSH session.
Once you accept the SSH fingerprint in PuTTY (only happens at the first connection) you will be able to log in using the cliuser account:

You’re all set now for remote management of your UCS Platform Emulator just as if it was a real UCS environment.
Powering Down and Restarting the UCS Platform Emulator
The links to manage the power state of your virtual UCS environment are in the web UI by clicking the Restart tab in the left hand pane:
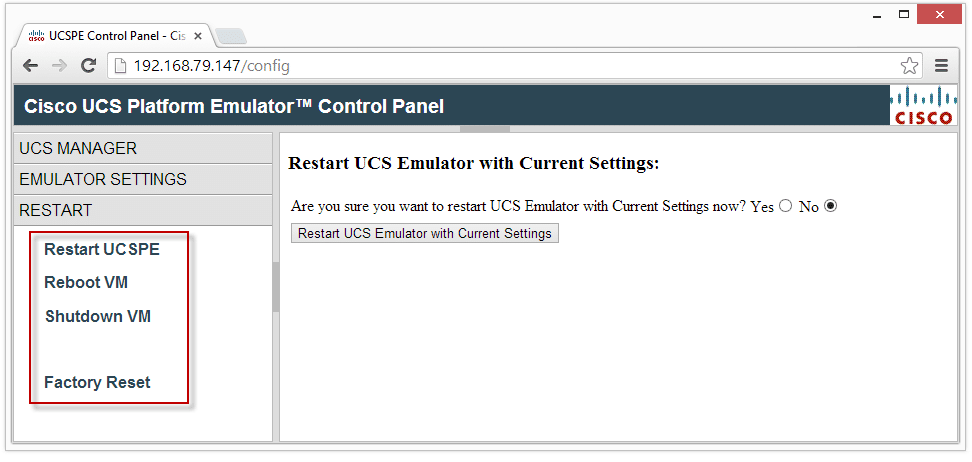
Each of the options has a button to ensure that you confirm the restart, plus there are settings options to save the configuration.
Go forth and be awesome!
Now it’s up to you how you would like to configure and test drive your system. We can use VMware Workstation snapshots to protect the machine just like any other virtual machine which adds some extra safety as you drill around to manage the virtual UCS system, however with the ability to do factory reset and configuration export, you may never need to use the native VMware Workstation protection.
Even if you aren’t running on Cisco UCS today, this is a great way to take a look at the logical configuration of the system and how you can administer it via the CLI and the web UI.
Happy UCSing!
Great post Eric! I wish someone had written something like this when I was just clicking around figuring it out a few months ago. : )
Thanks for the kind feedback Joe!
Fantastic post! Found it just as I am about to start playing with the emulator.
Thanks Jeet!
Sir Eric i have a problem after the installation on the vmware workstation 10 it generated an ip address (Cisco Ucs UI: 192.168.X.X) when i tried it on google chrome it says the page is not available, what do you think is the problem sir, i did all the steps accordingly. Please help me.
PC SPEC:
Windows 7 pro 64bit
Inteli5
4 gig ram
Nvidia Gt325m
Hi Ian,
Sorry for the late reply on this. Your post got flagged as spam for some reason. Are you able to ping the address ok from your local workstation? You may need to see if there is any firewall that may be blocking the access to the virtual network. You should also check that you can ping the virtual gateway which should be the 192.168.x.2 most likely.
Thanks…Eric
Thanks fro the post, sounds super cool, iv installed it already and I’m running it. Now i just need to get some reading materials because i only know how to check for faults.
can anyone point out to good reading materials maybe on ccna datacenter ucs?
Hi Curt,
There are lots of resources out online for CCNA DC for sure. A great place to start is with the bloggers who cover the UCS area. Scott Hansen (http://ciscoservergeek.blogspot.ca/) has lots of great articles, and he does lots of whiteboard sessions on the UCS platform. Scott is a great guy and may also have some other resources to suggest. You can find him on Twitter at http://twitter.com/CiscoServerGeek to reach out for more info.
Thanks!
Hi Eric,
Thanks for your effort. I have some issues and I think I’ve missunderstand some of the steps of the configurations.
How can I download the UI file to manage the ucs emulator using VMware workstation? What are the network adaptors 1,2 &3 options (bridge, NAT or Host only?).
For the management, do I have to enter the ip address in the host’s internet browser or I use one virtual machine with windows OS to manage the ucs?
Do I have to change the IP addresses for my host network to be at the same subnet as the ucs (in your case here I suppose to use 192.168.79.1 for example)?
I am really interested in learning this technology and I’ll be thankful for your help.
Regards
Hi Aziz,
The UI is entirely web based within the system, so you should be able to just use the IP address that is assigned to the system as shows in the post. If I’m missing something with my interpretation of the question, please let me know.
The additional network cards are meant for being able to run multiple management networks, so for the VM you will not need to configure those. That is more for emulating the actual UCS production build.
You will need to use an IP address that is the same as your VM Workstation network. As you noted, my example uses 192.168.79.0/24 for the network. Yours will probably be different.
Hopefully you are able to get up and running to give the system a try!
Nice post.
Is it just me or in the recent version can you on have one chassis and one FI ?
Great question Richie! I’ll have to pull down the latest iteration to see how the FI configuration is.
Thanks Eric, appreciated.