The lab is an ideal way to kick the tires on new ways to do things. This means that you may want to use the same platforms that you use in your data center right in your local environment. Recently, I wanted to test out a lot of the integration that Turbonomic has with CloudFoundry and AWS, but I didn’t want to spin up my whole vSphere environment which has a nested instance running on it.
My quick solution was to deploy the Turbonomic OVA onto VirtualBox and running it as a standalone Turbonomic Control Instance along side my other VirtualBox VMs. This is actually an upgrade from the way I had build the TurboStack environment to run the OpenStack Cookbook and Turbonomic all together in a VirtualBox nested lab.
It’s super easy, but comes with a couple of caveats. First, don’t run your production infrastructure this way. VirtualBox is meant to host your lab content, and isn’t really geared for high performance to the underlying instances. Secondly, your networks will differ depending on how you deploy VirtualBox. This sample uses a bridged networking deployment.
You’ll need VirtualBox and a Turbonomic OVA image which you can get from the Downloads page. If you don’t already have a license, you will get a 30 day trial. If you are a blogger and want to join our Turbonomic Blogger and Community Engagement program (totally free!), then you can also get extended NFR licenses. Please add a comment to this article if you need access and I will get you added to the program.
Deploying Turbonomic from the VMware OVA Image
Luckily, VirtualBox has all of the goodness needed to host a vSphere OVA image. Simply find your OVA file, right click (note: this is on Max OSX, but works the same for Windows) and choose to open wiht the VirtualBox application:
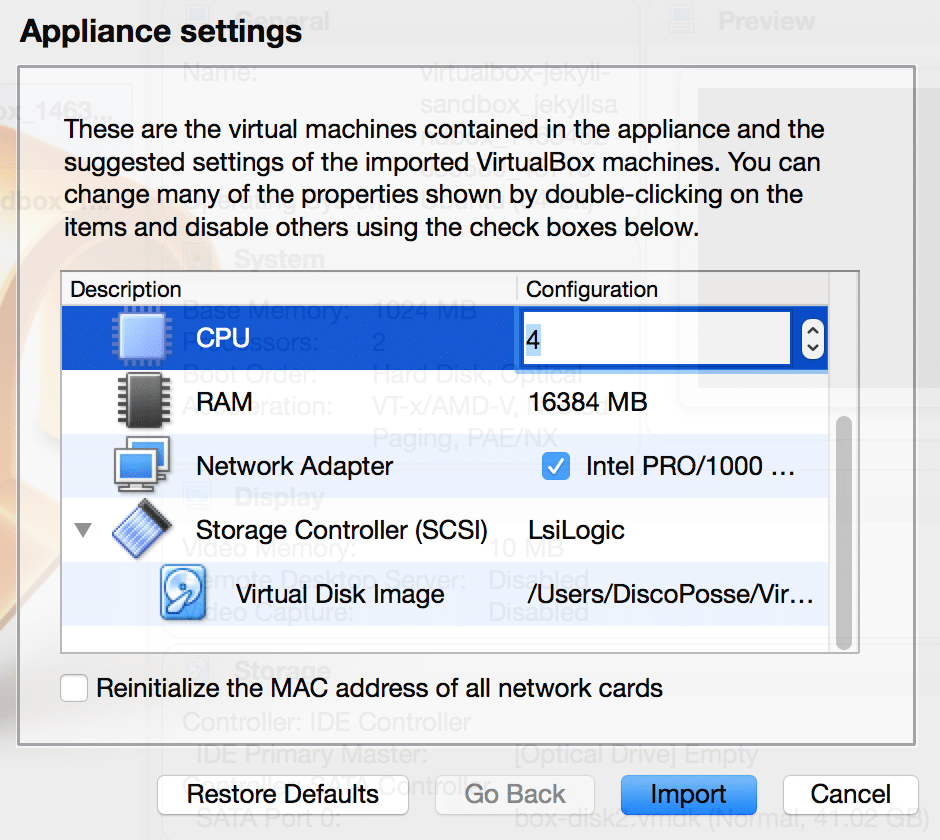
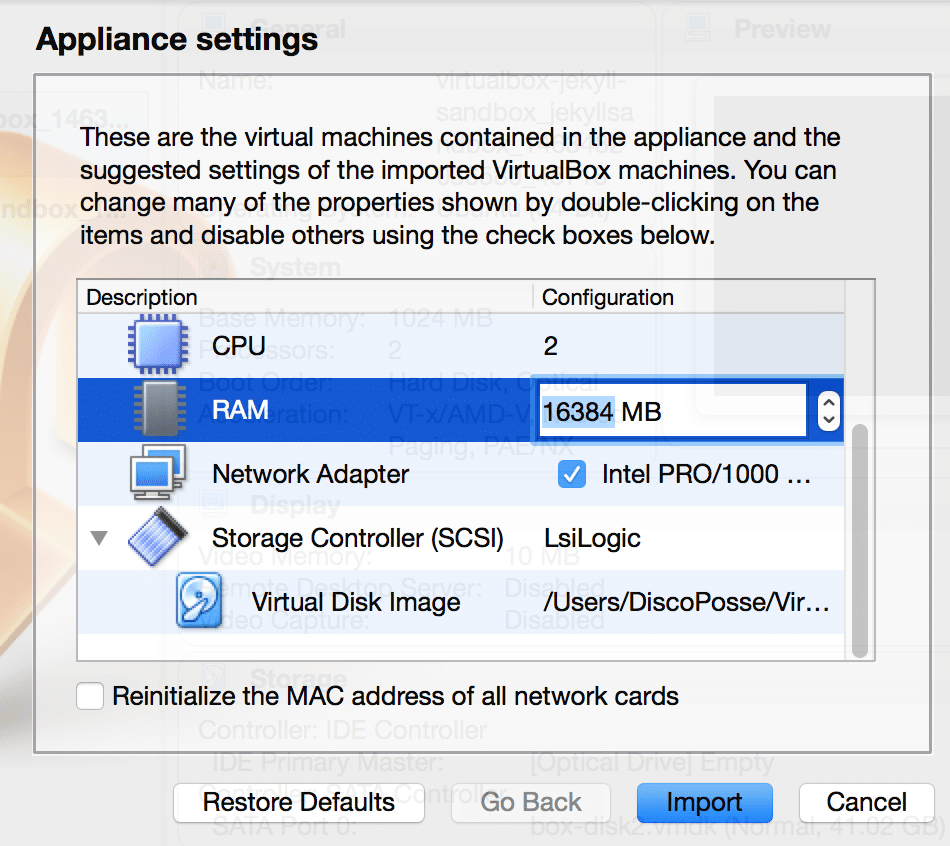
That will spawn the OVF wizard within VirtualBox. Make sure to adjust the memory and CPU as needed for your machine. In my case I want to trim back from the 16GB and 4 vCPU which is the production recommendation. For performance, it is best to run with a minimum of 8GB and 2 vCPU.
Set your CPU count (minimum 2 vCPU recommended):
Set your Memory capacity (minimum 8192 MB recommended):
Click the Import button and you will be prompted for the EULA which you need to click Agree to complete:
The wizard will show a progress bar as it deploys the instance for you:
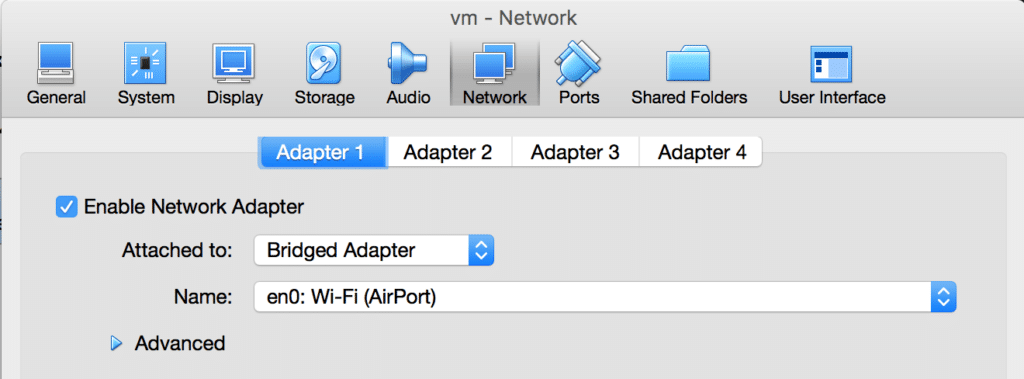
Once completed, launch the networking properties for your Turbonomic instance and set as needed to match what your other machines are on. If you need to connect to AWS, Azure, or Softlayer, you will need internet access as well. In my case, I want to run DHCP and leave the machine on a Bridged network to access the local Wifi network directly:
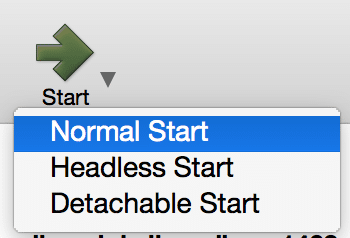
Next up, just launch using a Normal Start so that you can get to the console:
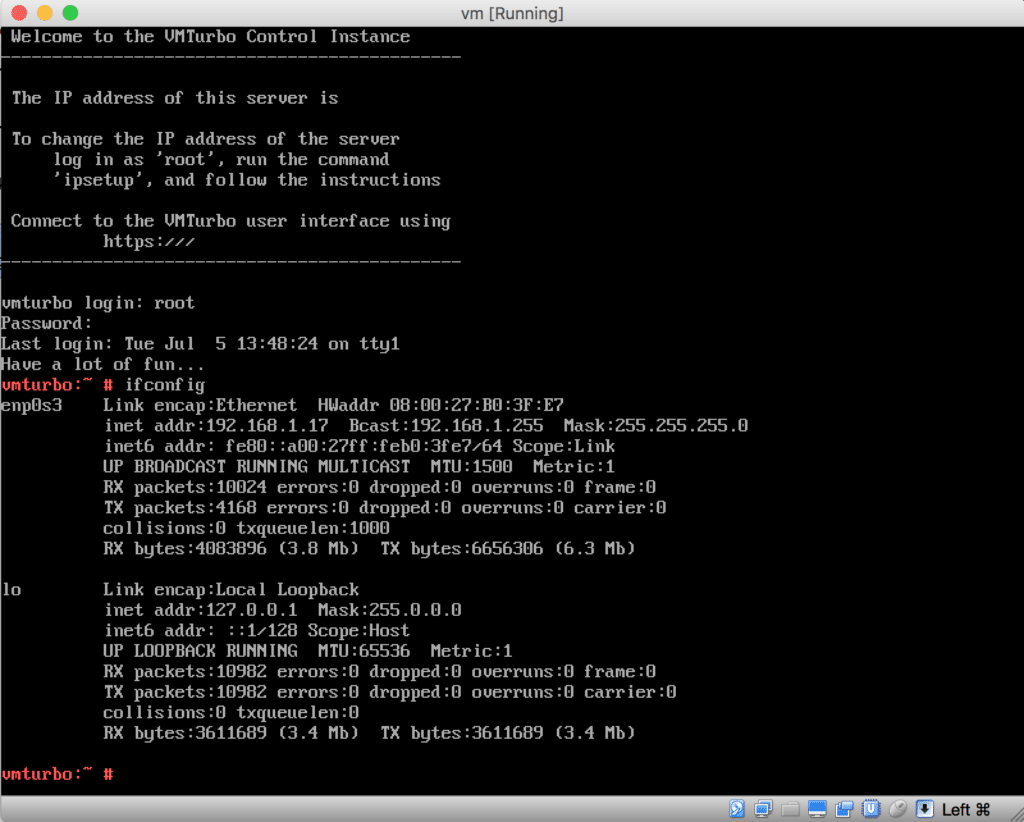
Once the instance has booted up, log in as root with the password provided in your download instructions and you can get the IP information of the machine:
Now you are all set to launch the web UI by using the IP address of the VirtualBox instance over HTTP and follow the wizard to apply your existing license to the machine, or to request your 30 day trial.
You have a working Turbonomic control instance in your lab and we can use this for testing various features such as those I’m going to explore here around the AWS and Cloud Foundry.
Let me know if you need any help, and you can also consult the Green Circle Community for any questions related to Turbonomic itself.




I am a operations lead , and not a blogger, I learn new technlogys in my personal time, and then implement commercially when I see opportunitys, I have a home lab running ESXi and Hyperv servers, and would love the opportunity to learn your product at a non rushed time, would it be possible to get a NFR license, i have entered the home lab competition previously, but yet to win, and I am interested to see what your product is capable of.
Hi Andrew,
Drop me an email to eric.wright – at – turbonomic – dot – com and I can get you set up with access.
Thanks!
Eric