Kubernetes has become the next big thing lately. It didn’t happen overnight, even though it may seem like it. It all depends on which news trend site you follow. Kubernetes is the container orchestration system that came out of the Google environment. It’s a result of the learnings of development on Borg, and subsequently on Omega.
History aside, Kubernetes is one of the fastest growing open source platforms in the world today. There is a huge ecosystem wrapped around it on governance and development. It’s gaining momentum in every way. The only thing that makes it challenging for many of today’s virtualization admins and architects is that it is a new way to look at infrastructure. This brings up the classic questions about what problems Kubernetes solves, how to map it to business requirements, and then to work out all of the architectural needs of a Kubernetes deployment and administration plan.
Before you even go down that road, you should at least get some early views into how to run a small Kubernetes environment as quickly and simply as possible. The community has solved that for is with Minikube!
Getting Started with Kubernetes Using Minikube
Minikube is a quick and easy way to kick the tires on using Kubernetes. It’s not designed for scalability or resiliency. It’s designed to let you try out the Kubernetes CLI and API tools on a small single-node lab. When you want to do your first couple of commands with Kubernetes, there really isn’t an easier way.
You need a couple of simple things. You’ll need VirtualBox running on OS X or Linux. There is an experimental Windows build, but I haven’t tested it out. This environment can be done on a nested VM, or you can do this on your native system. For Windows hosts, you obviously need to use a nested VM as the source machine to launch Minikube. These instructions are on an OS X system.
Installing Kubectl
You also need the kubectl command line utility. This can be gotten quite easily by following instructions which link to the latest build:
http://kubernetes.io/docs/getting-started-guides/minikube/#install-kubectl
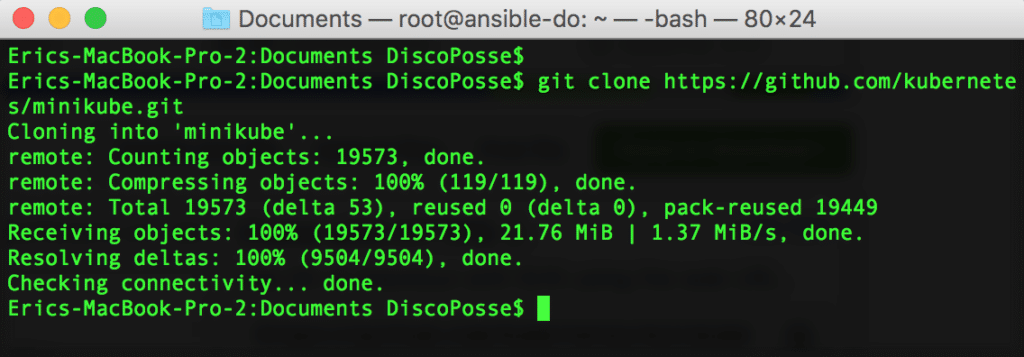
First, clone the GitHub repo of Minikube which you can find here by using the git clone https://github.com/kubernetes/minikube.git command:
Change directory into the minikube folder and we are ready to get started. It’s as easy as running the minikube start command which will run the first download of the Minikube VM image and to set up the running machine:
You can confirm the IP address of your Minikube system by running the minikube ip which will return the IP of your demo system:
Running the Kubernetes Dashboard with Minikube
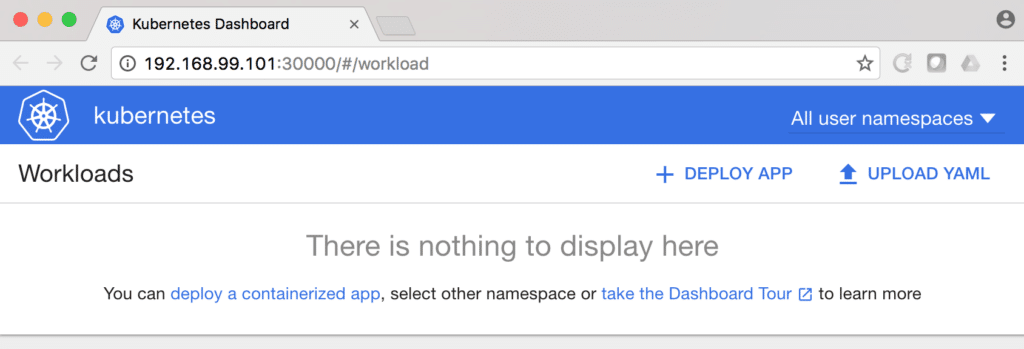
There is a nifty web dashboard that works along with the Kubernetes environment. Using Minikube also means that you have the dashboard available just by running the minikube dashboard command:
That also launches your default browser to the URL of the Kubernetes dashboard service which is running on port 30000 on the Minikube VM:
There is not much to see her just yet, but it is good to have both the web and CLI access ready as we launch a quick test pod.
If we look at the current configuration, you can see the node running is our Minikube VM with the kubectl get nodes command:
Running the kubectl get pods --all-namespaces will show us the running pods including our management and dashboard:
Your Hello World Pod
Running the sample app is super easy. Here are the simple steps that will do the following:
- Deploy the Hello Minikube application
- Expose the Hello Minikube port to your local machine
- Stop your Minikube VM
Start out by running the deployment using the kubectl run hello-minikube --image=gcr.io/google_containers/echoserver:1.4 --port=8080 command. This pulled the container image by the URL you see, including the version number (1.4) and assigns the port to it (8080):
You can check the status using the kubectl get pods command to see your hello-minikube pod instance:
Next, we will expose the application using the kubectl expose deployment hello-minikube --type=NodePort command:
That creates a service which exposes the external access via the port that is defined in the pod configuration. Because we had defined it to run on port 8080, that is what will show as the exposed port if you run the kubectl get service command:
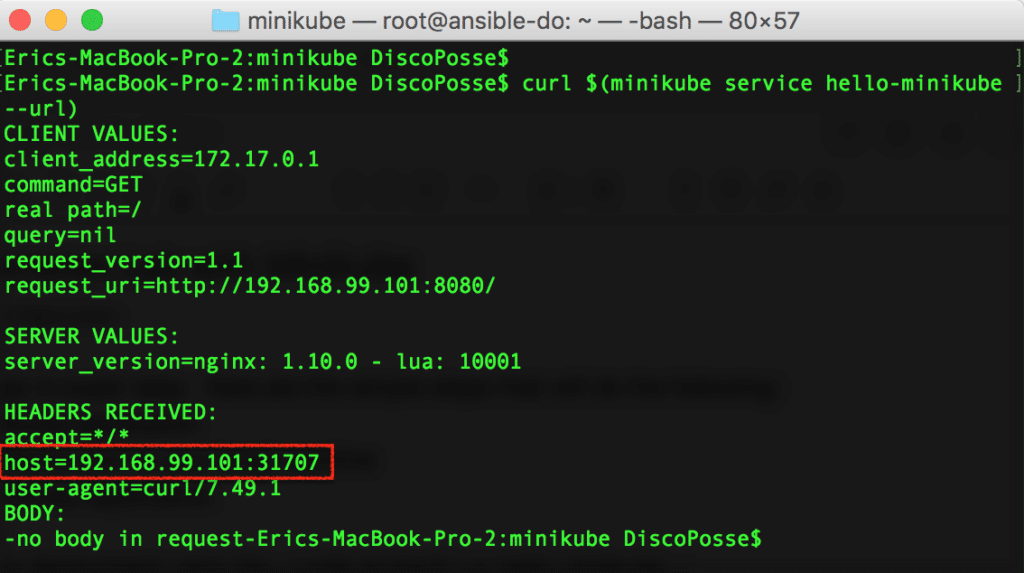
Now we will check the details of the hello-minikube pod itself using the curl $(minikube service hello-minikube --url) command:
What’s great about this is that we’ve simply queried the API and passed the parameters from the service. This gave us the details we need to test out the exposed port to confirm everything is working. The highlighted red area in my particular example shows that we are mapped to port 31707 from the internal port 8080.
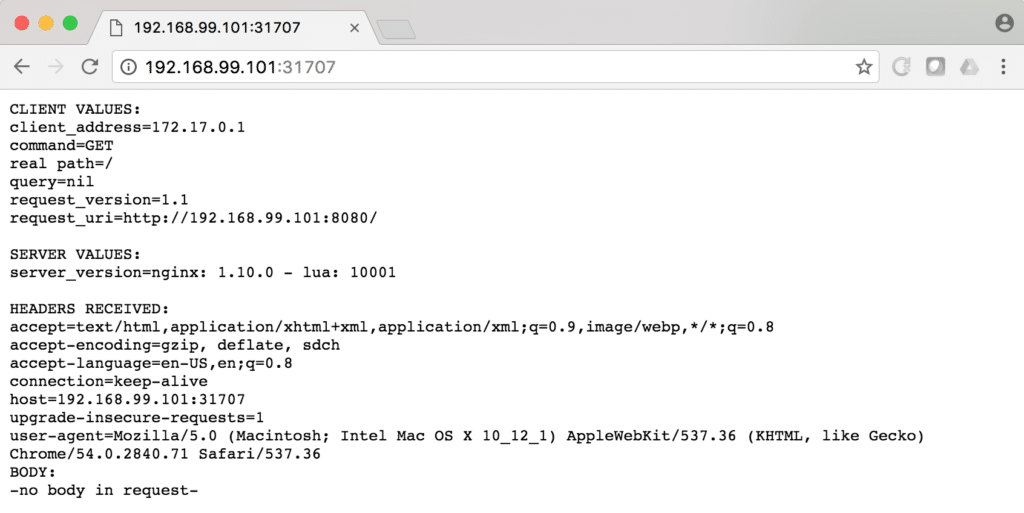
Just open up your browser to the URL provided in your system:
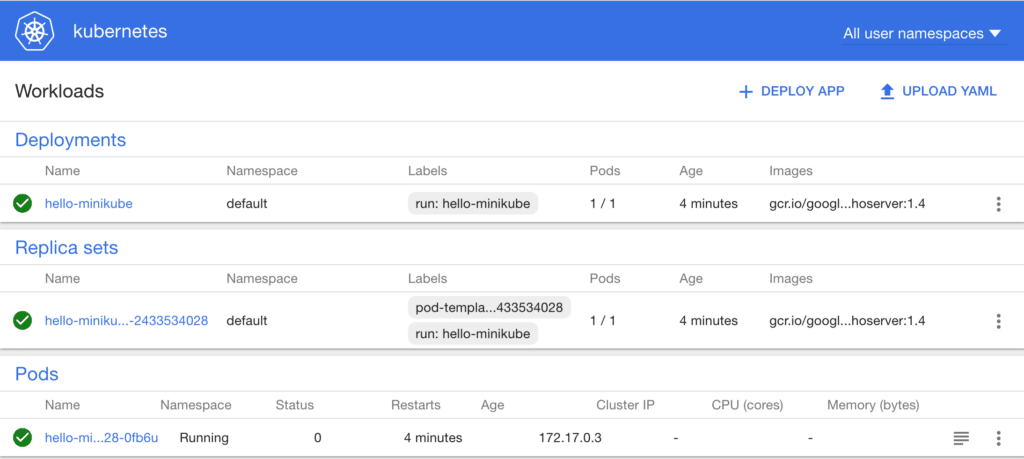
Voila! You’re now all connected. Now, let’s look at the dashboard view. Refresh your browser where the Kubernetes dashboard is running and you’ll see lots of details suddenly available. We will explore this more in future, but feel free to click around as you wish in the mean time.
Stopping your Minikube System
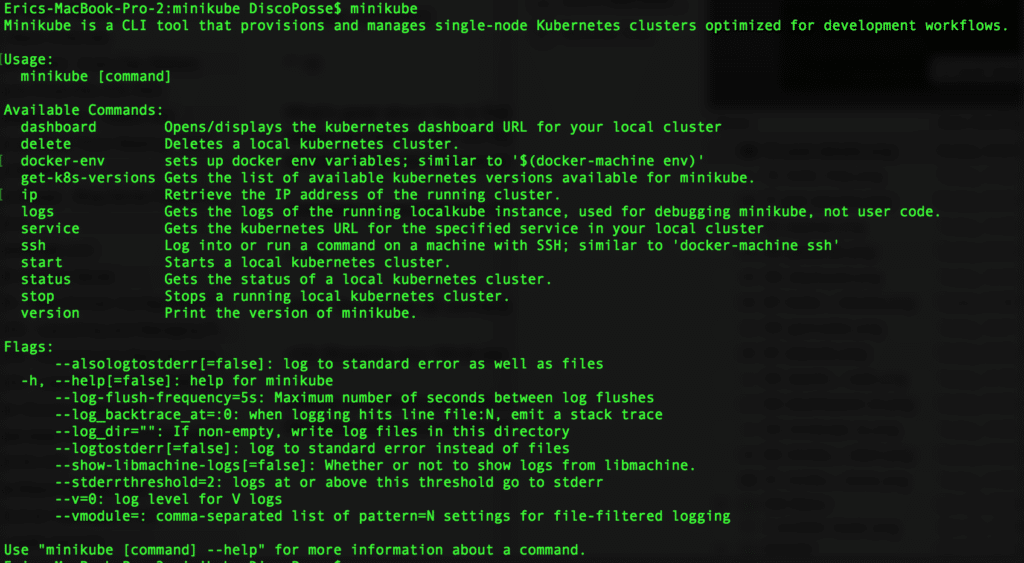
Halting your Minikube safely is the next step. You can spend more time digging around with your Minikube by using the Minikube command which include start and stop plus many more of the available commands:
Let’s stop our Minikube now so that we can make sure that it’s preserved for more experimentation later. It also makes sure that it is in a clean state and that it isn’t using up resources in the background when you aren’t using it. This is done with the minikube stop command:
That’s your first look at the Minikube Kubernetes lab. Hopefully this gives you a chance to experiment with your local environment on your own. Look for more posts here on how to get some Kubernetes goodness under your belt which will prepare you for a journey into the world of container orchestration.


